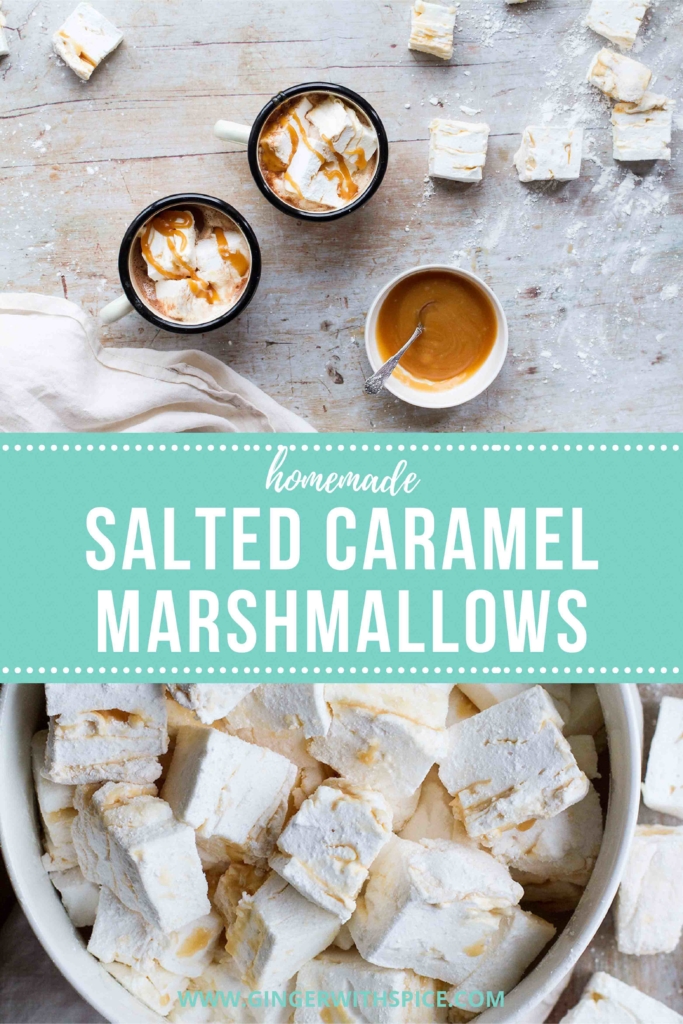


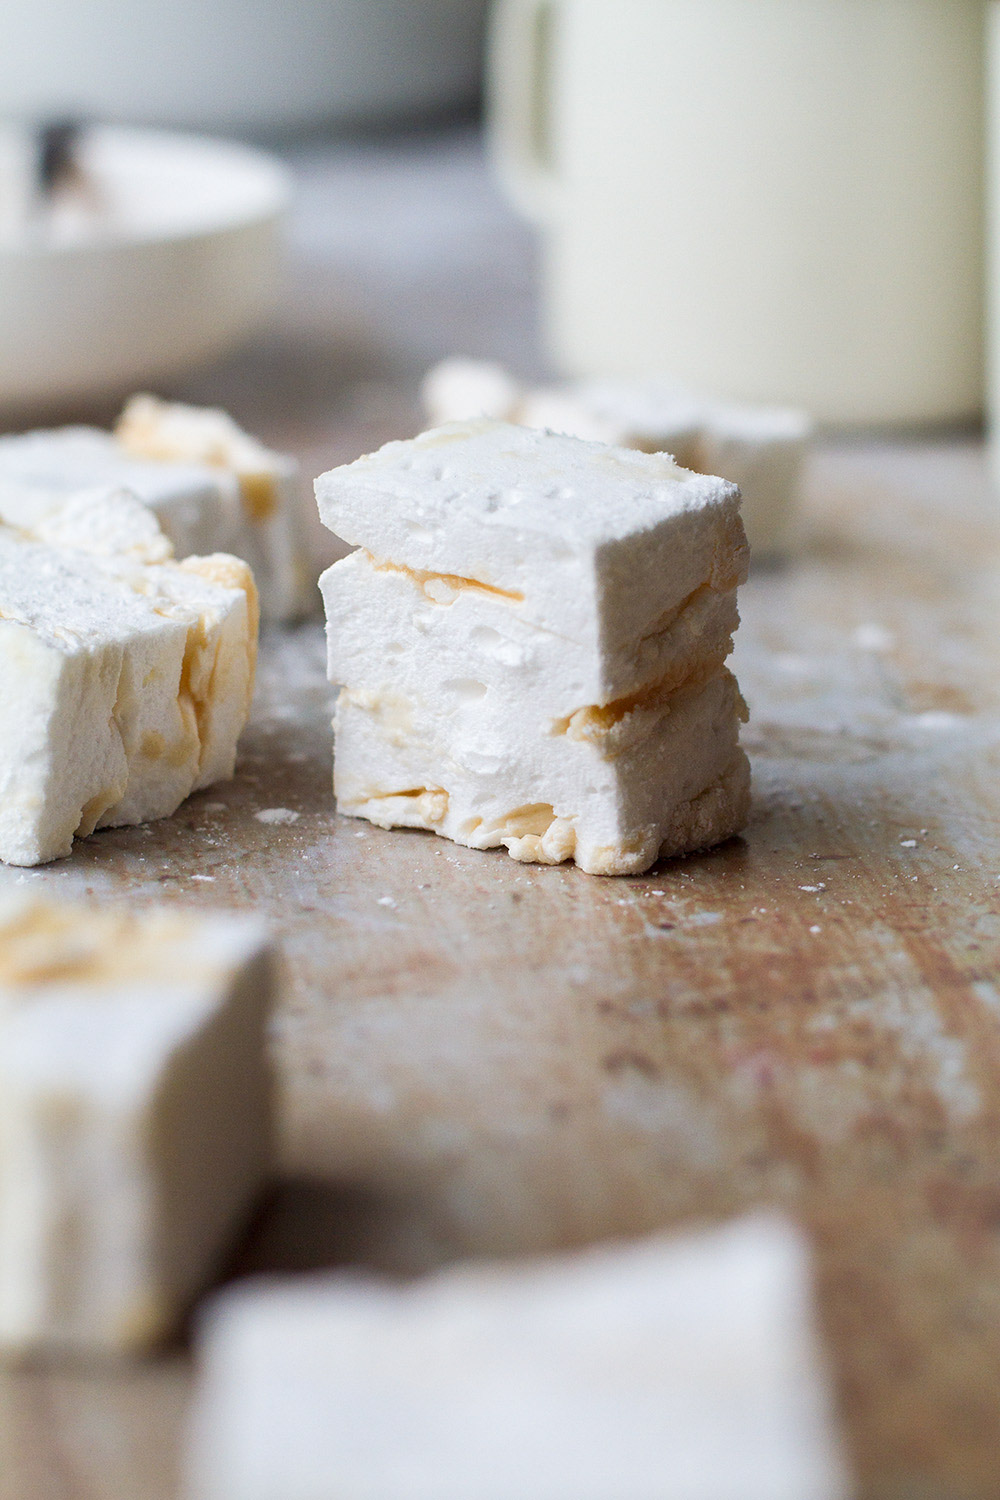
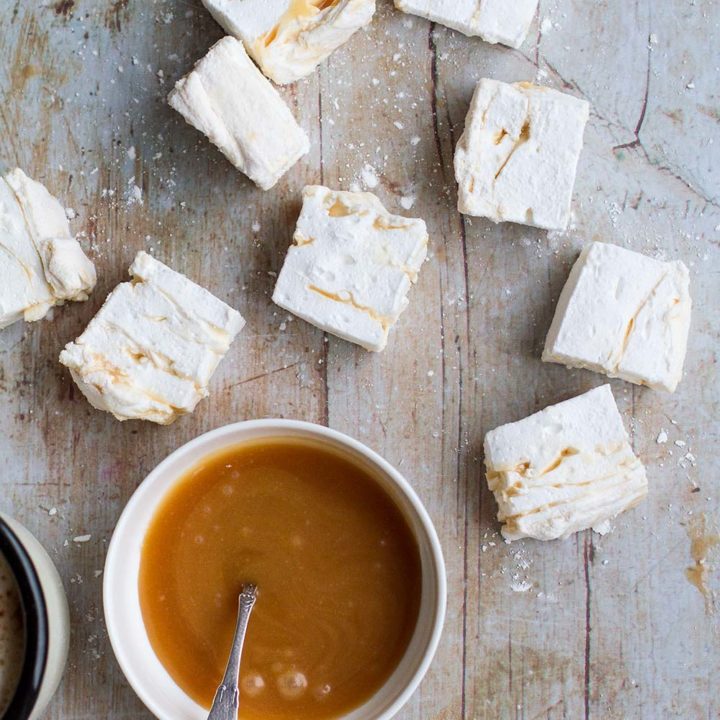
Imagine soft and fluffy homemade marshmallows with ripples of salted caramels inside as lovely salty surprises. Marshmallows are quite easy to make from scratch, and it is much more rewarding than any store-bought kind! This salted caramel marshmallows recipe requires just a few ingredients and the flavor and texture are unbeatable.

This recipe is also based on America's Test Kitchen and my own peppermint marshmallows recipe. Those are perfect for Christmas, but these caramel marshmallows are fabulous all year round. Truth be told, I do eat peppermint all year round too though... Anyway, salted caramel marshmallows are perfect for summer campfires too and I don't think peppermint works quite as well there.
What to do with marshmallows
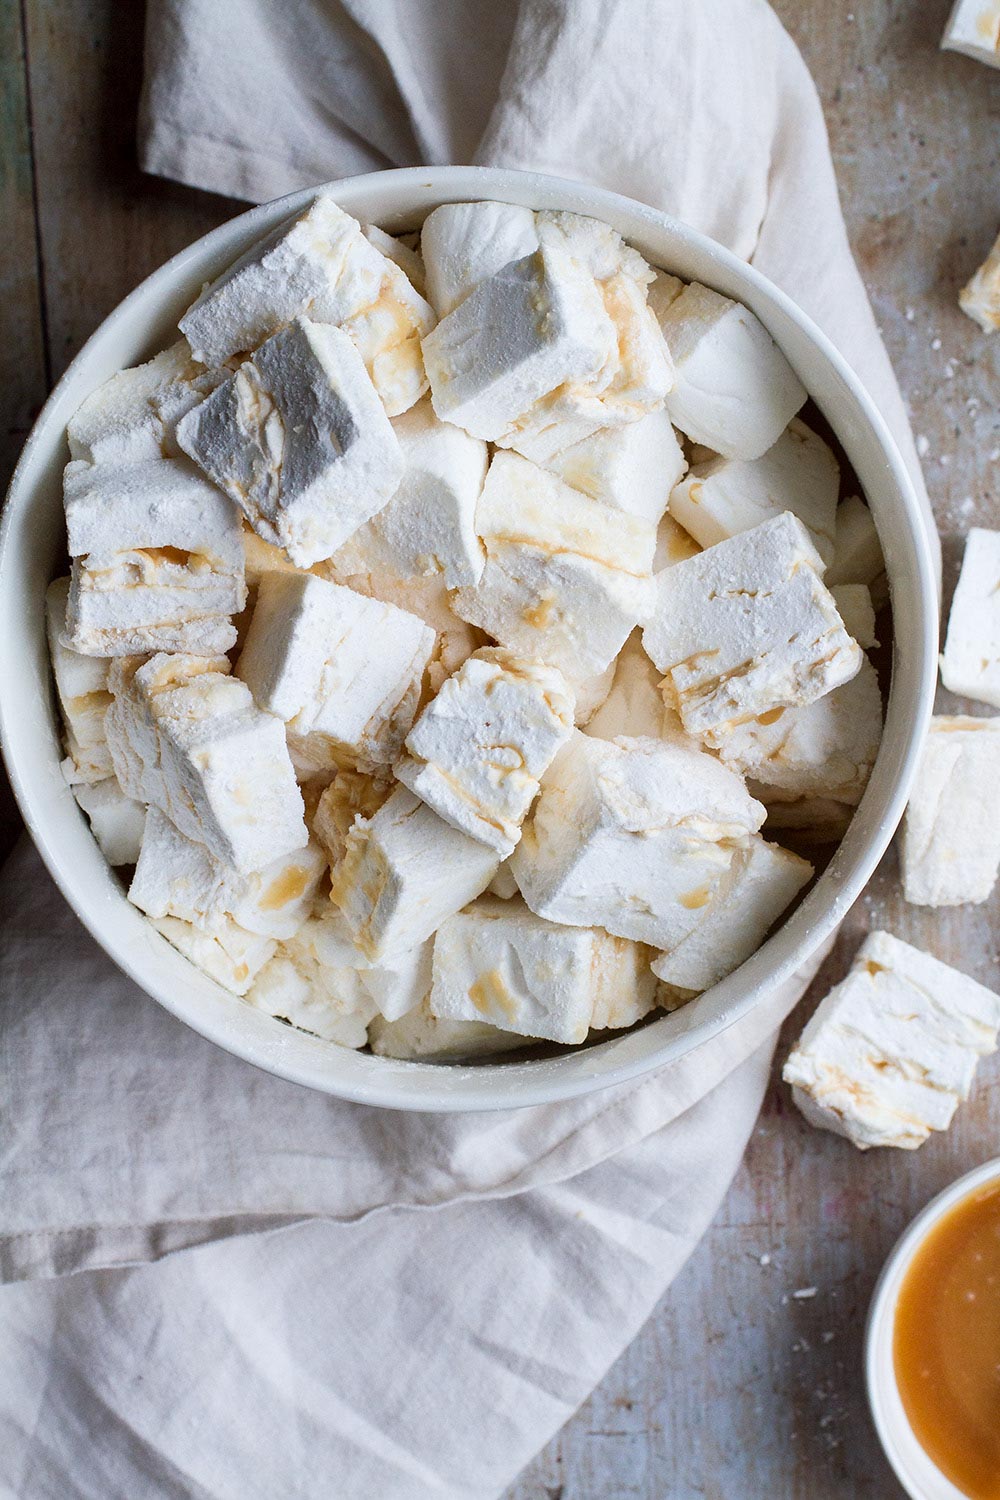
Right, you have made a huge batch of marshmallows and you're wondering if you can ever eat them all? The answer is yes. Homemade marshmallows are so much better than store-bought you could easily just eat them on their own. However, there are many different things to do with marshmallows:
- Eat them on their own right from the cookie box
- Toast them and eat them on their own
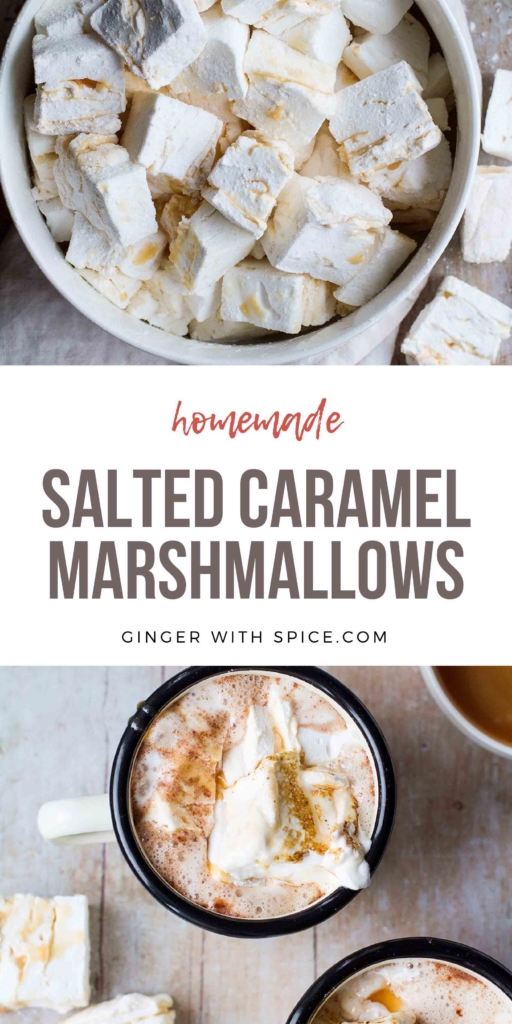
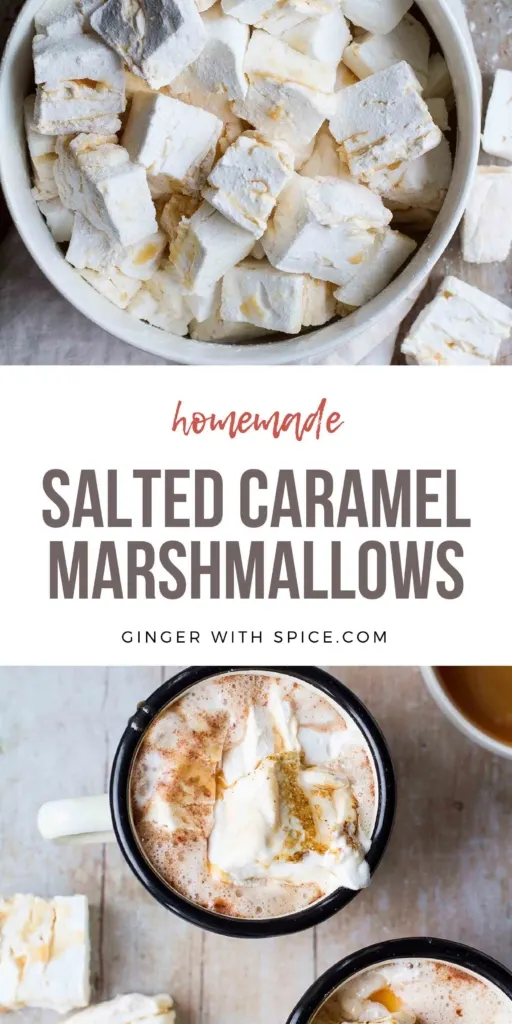
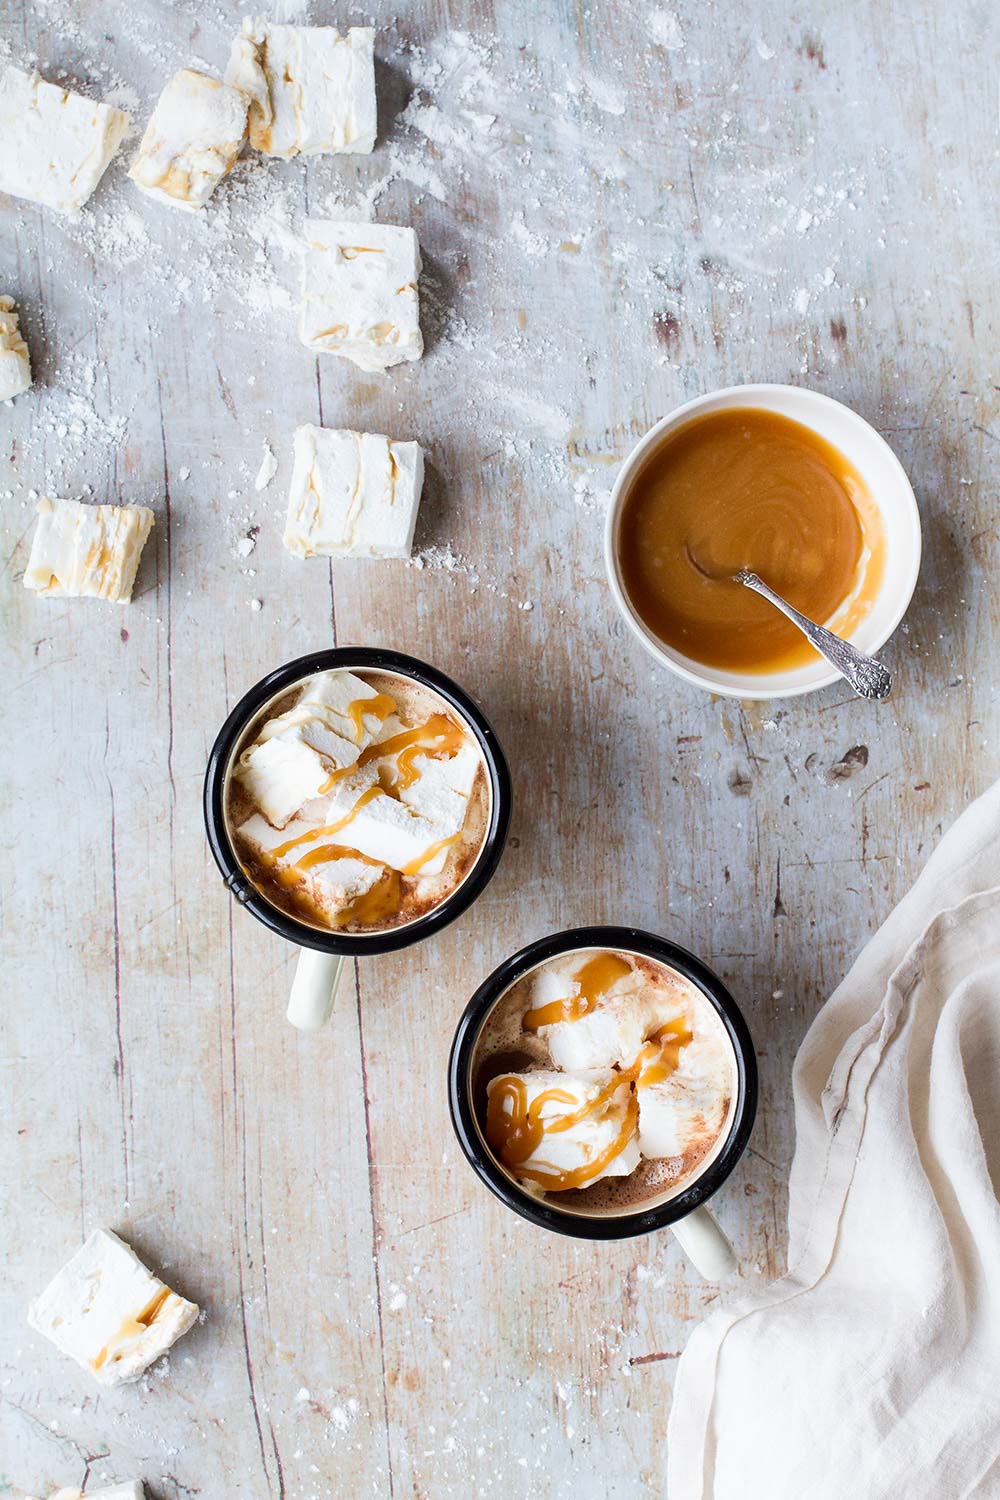
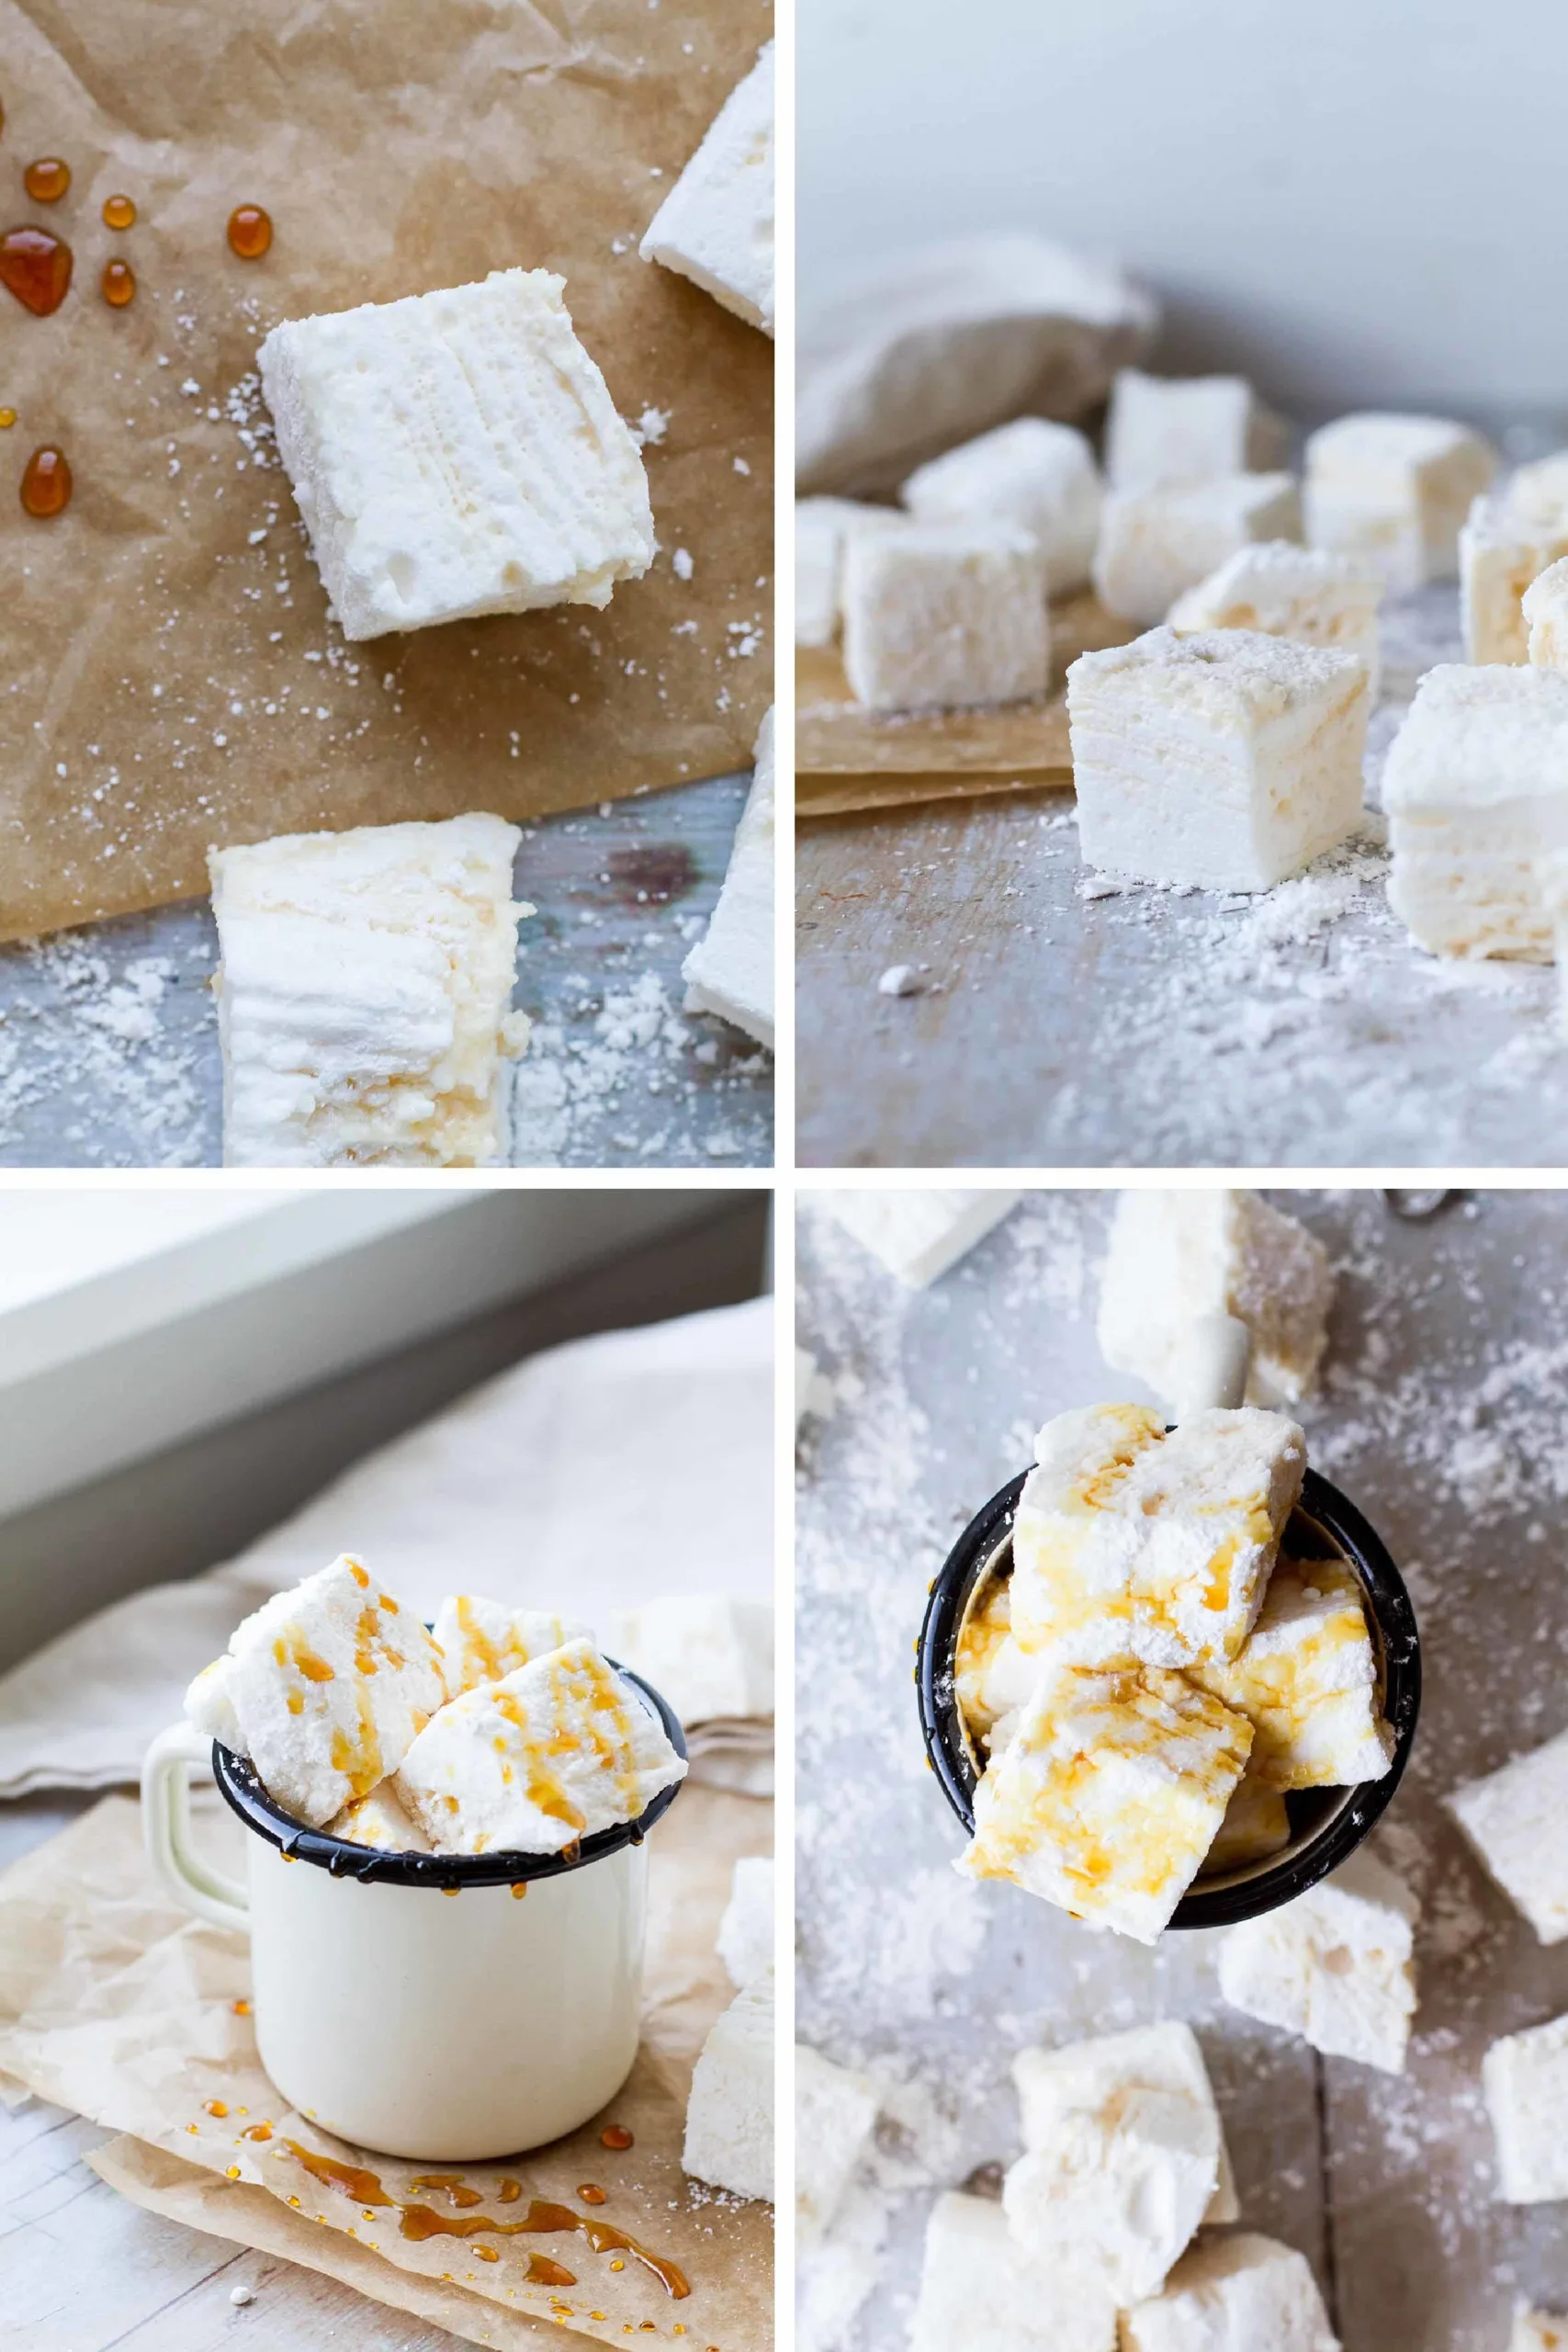
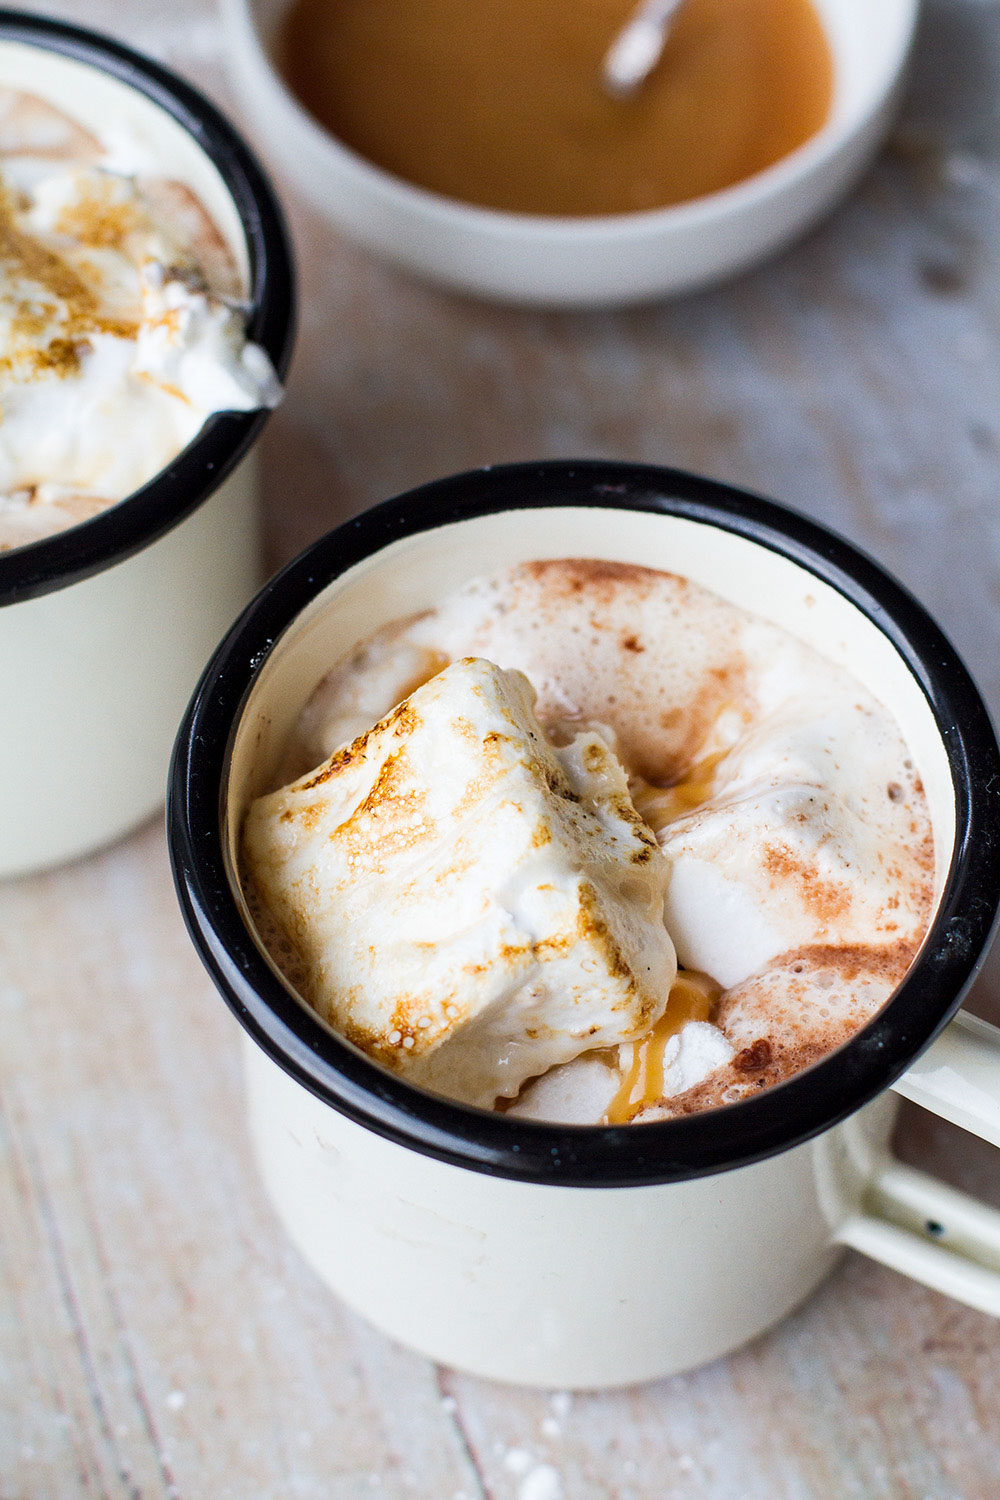
- Top a cup of hot chocolate
- In s'mores or any s'more related dessert
- Topping a sweet potato casserole for Thanksgiving
- Coat them in chocolate for a marshmallow bonbon
- Rocky road desserts, like fudge bars
You can always use store bought marshmallows, but once you start the homemade marshmallow train, you won't go back. Promise!

How to toast homemade marshmallows
Homemade marshmallows don't always have the same properties like store bought. First off, yes they will get that super yummy crispy exterior and melting insides.
BUT, they melt super duper fast. I would actually prefer to use a kitchen torch to toast them, because that goes really fast. You get a lot of heat in a short amount of time, so the insides don't have time to melt yet. And yes, they need to be eaten straight away as they continue to melt due to the hot exterior.

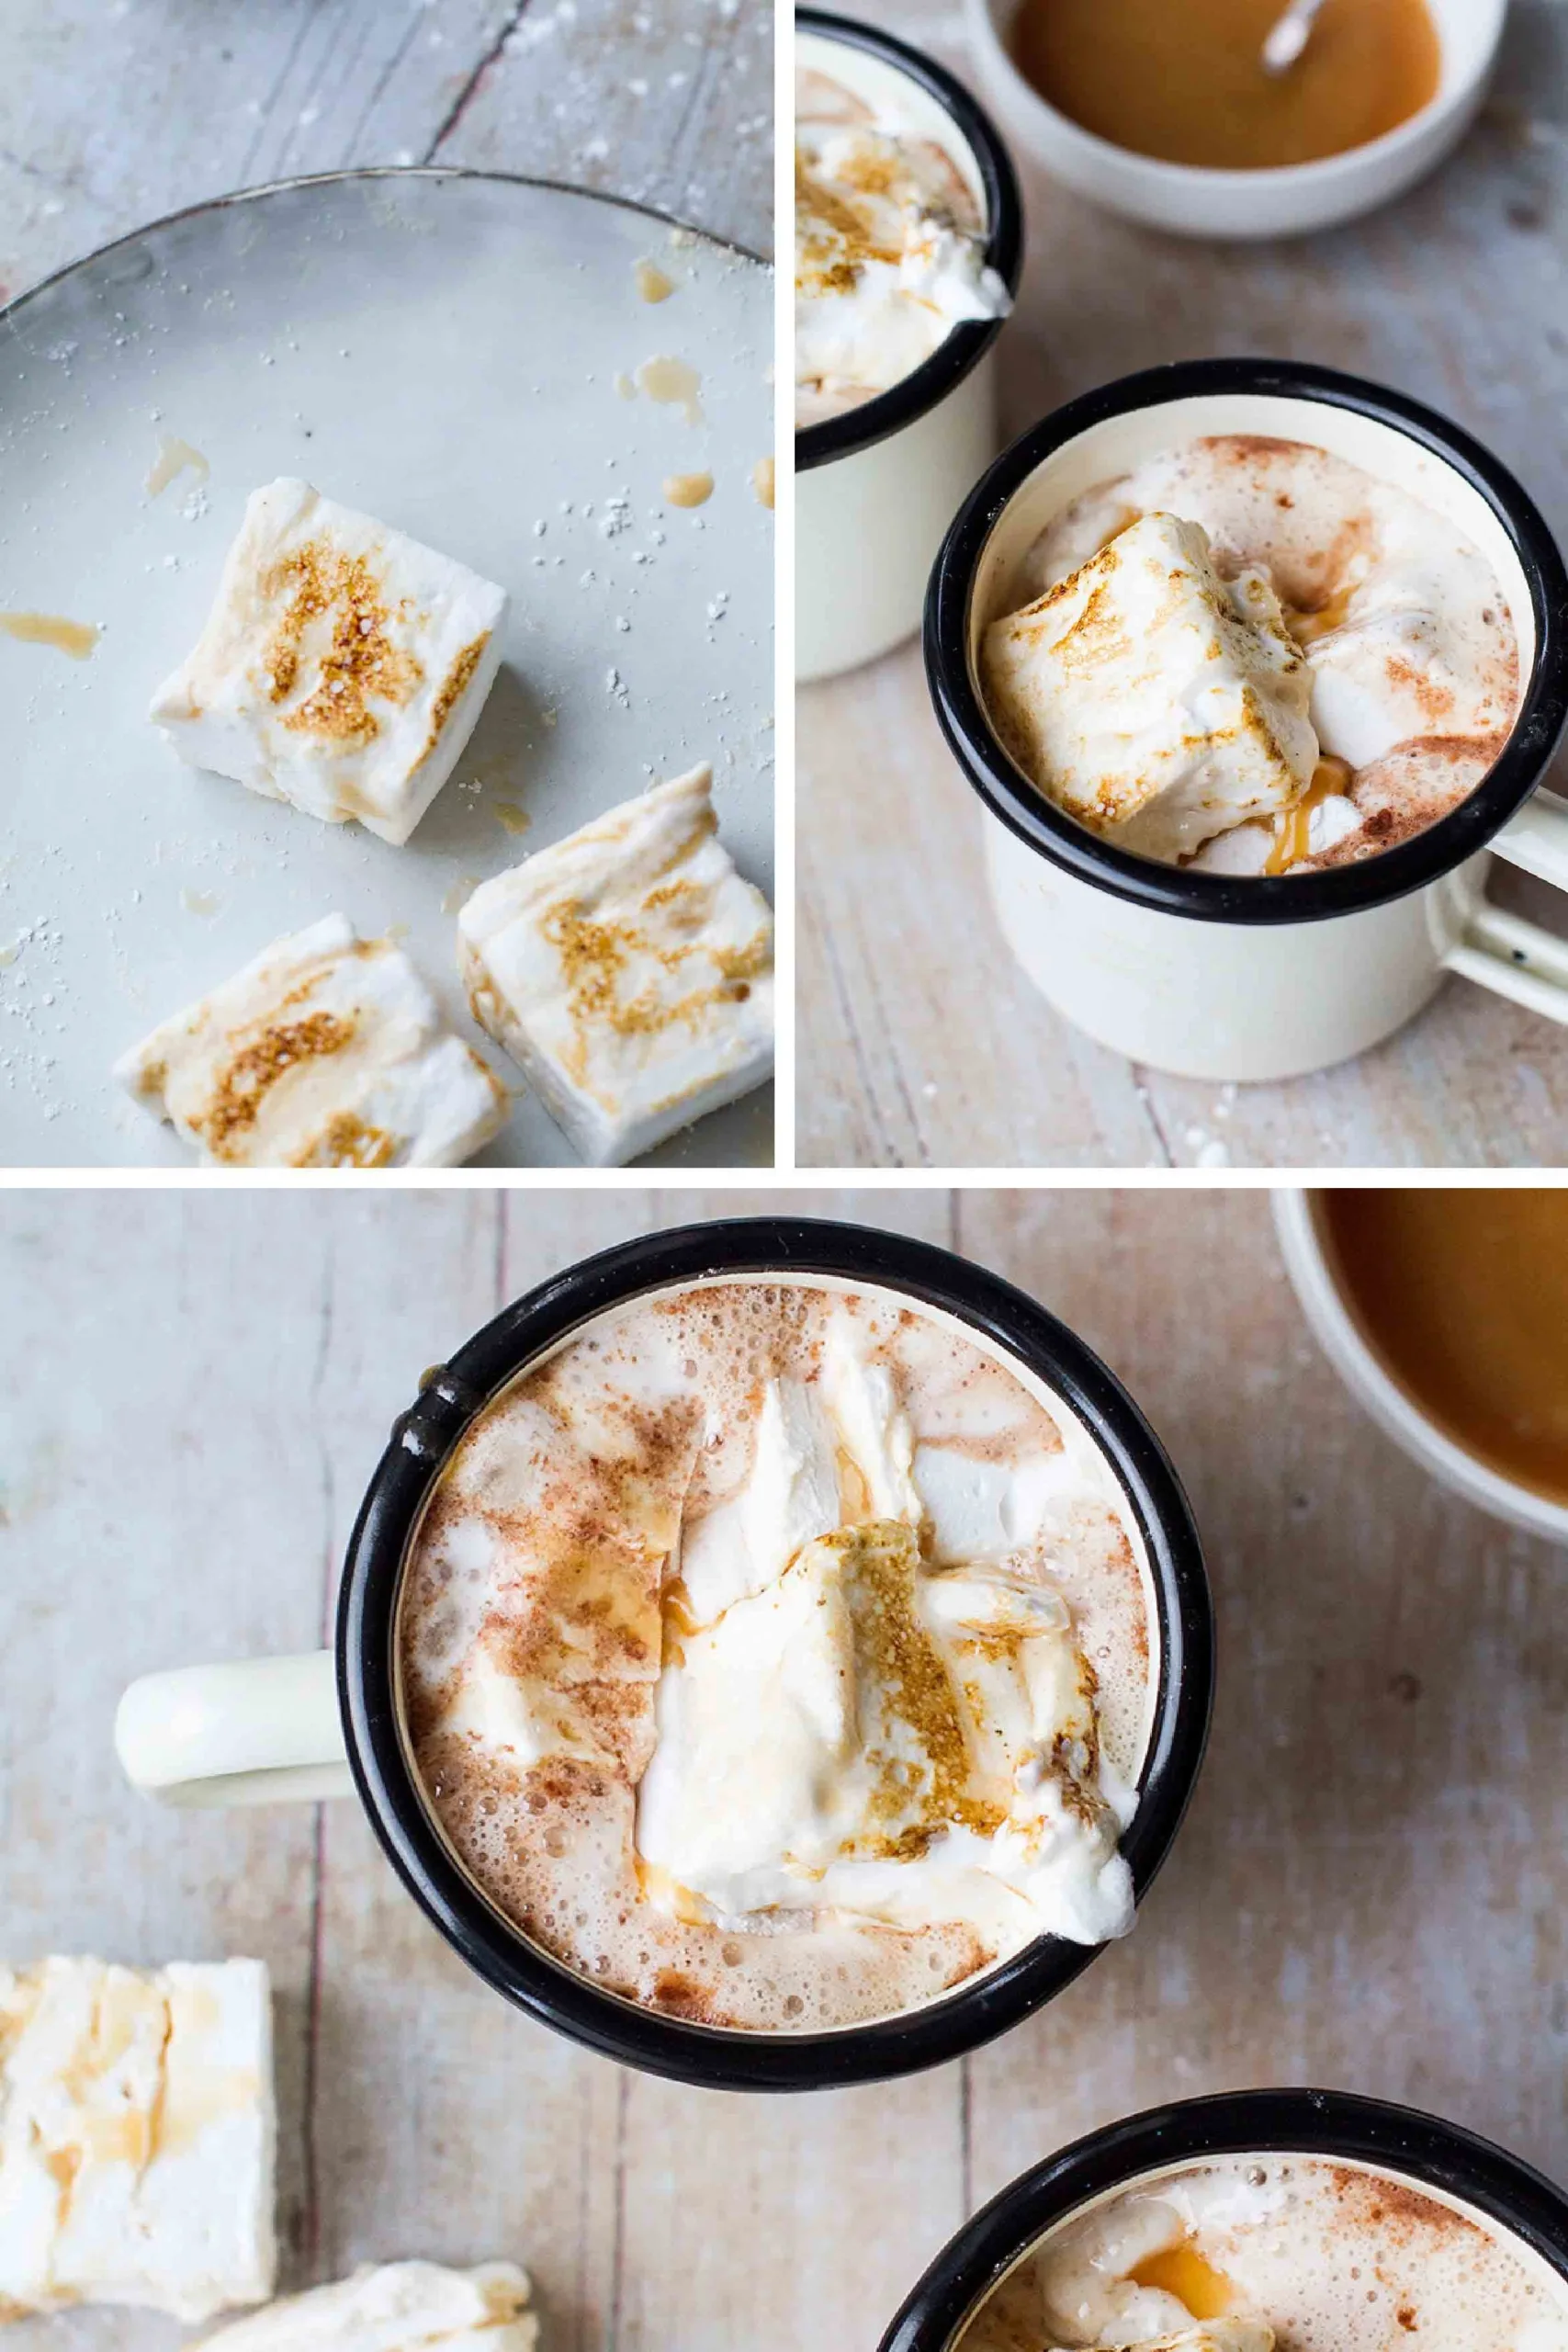
A thing that can help, is to actually not use freshly made marshmallows for toasting, but rather let them dry out for a couple of days before toasting. In these photos, they were freshly made though (using a kitchen torch) so it is still possible.
The thing with gelatine is that it will lose some of its setting properties at high temperatures and that is why they melt so darn quickly. I realized this one time when I was making a s'mores cheesecake with homemade marshmallows on top. When I baked it, it looked really good, but when I took it out, I realized all the gelatine had melted into the cake. Yes, that was not a good cake...
So if you want to use marshmallows for things like a cheesecake or other things that need heating for a longer time, I recommend going for marshmallow fluff instead!

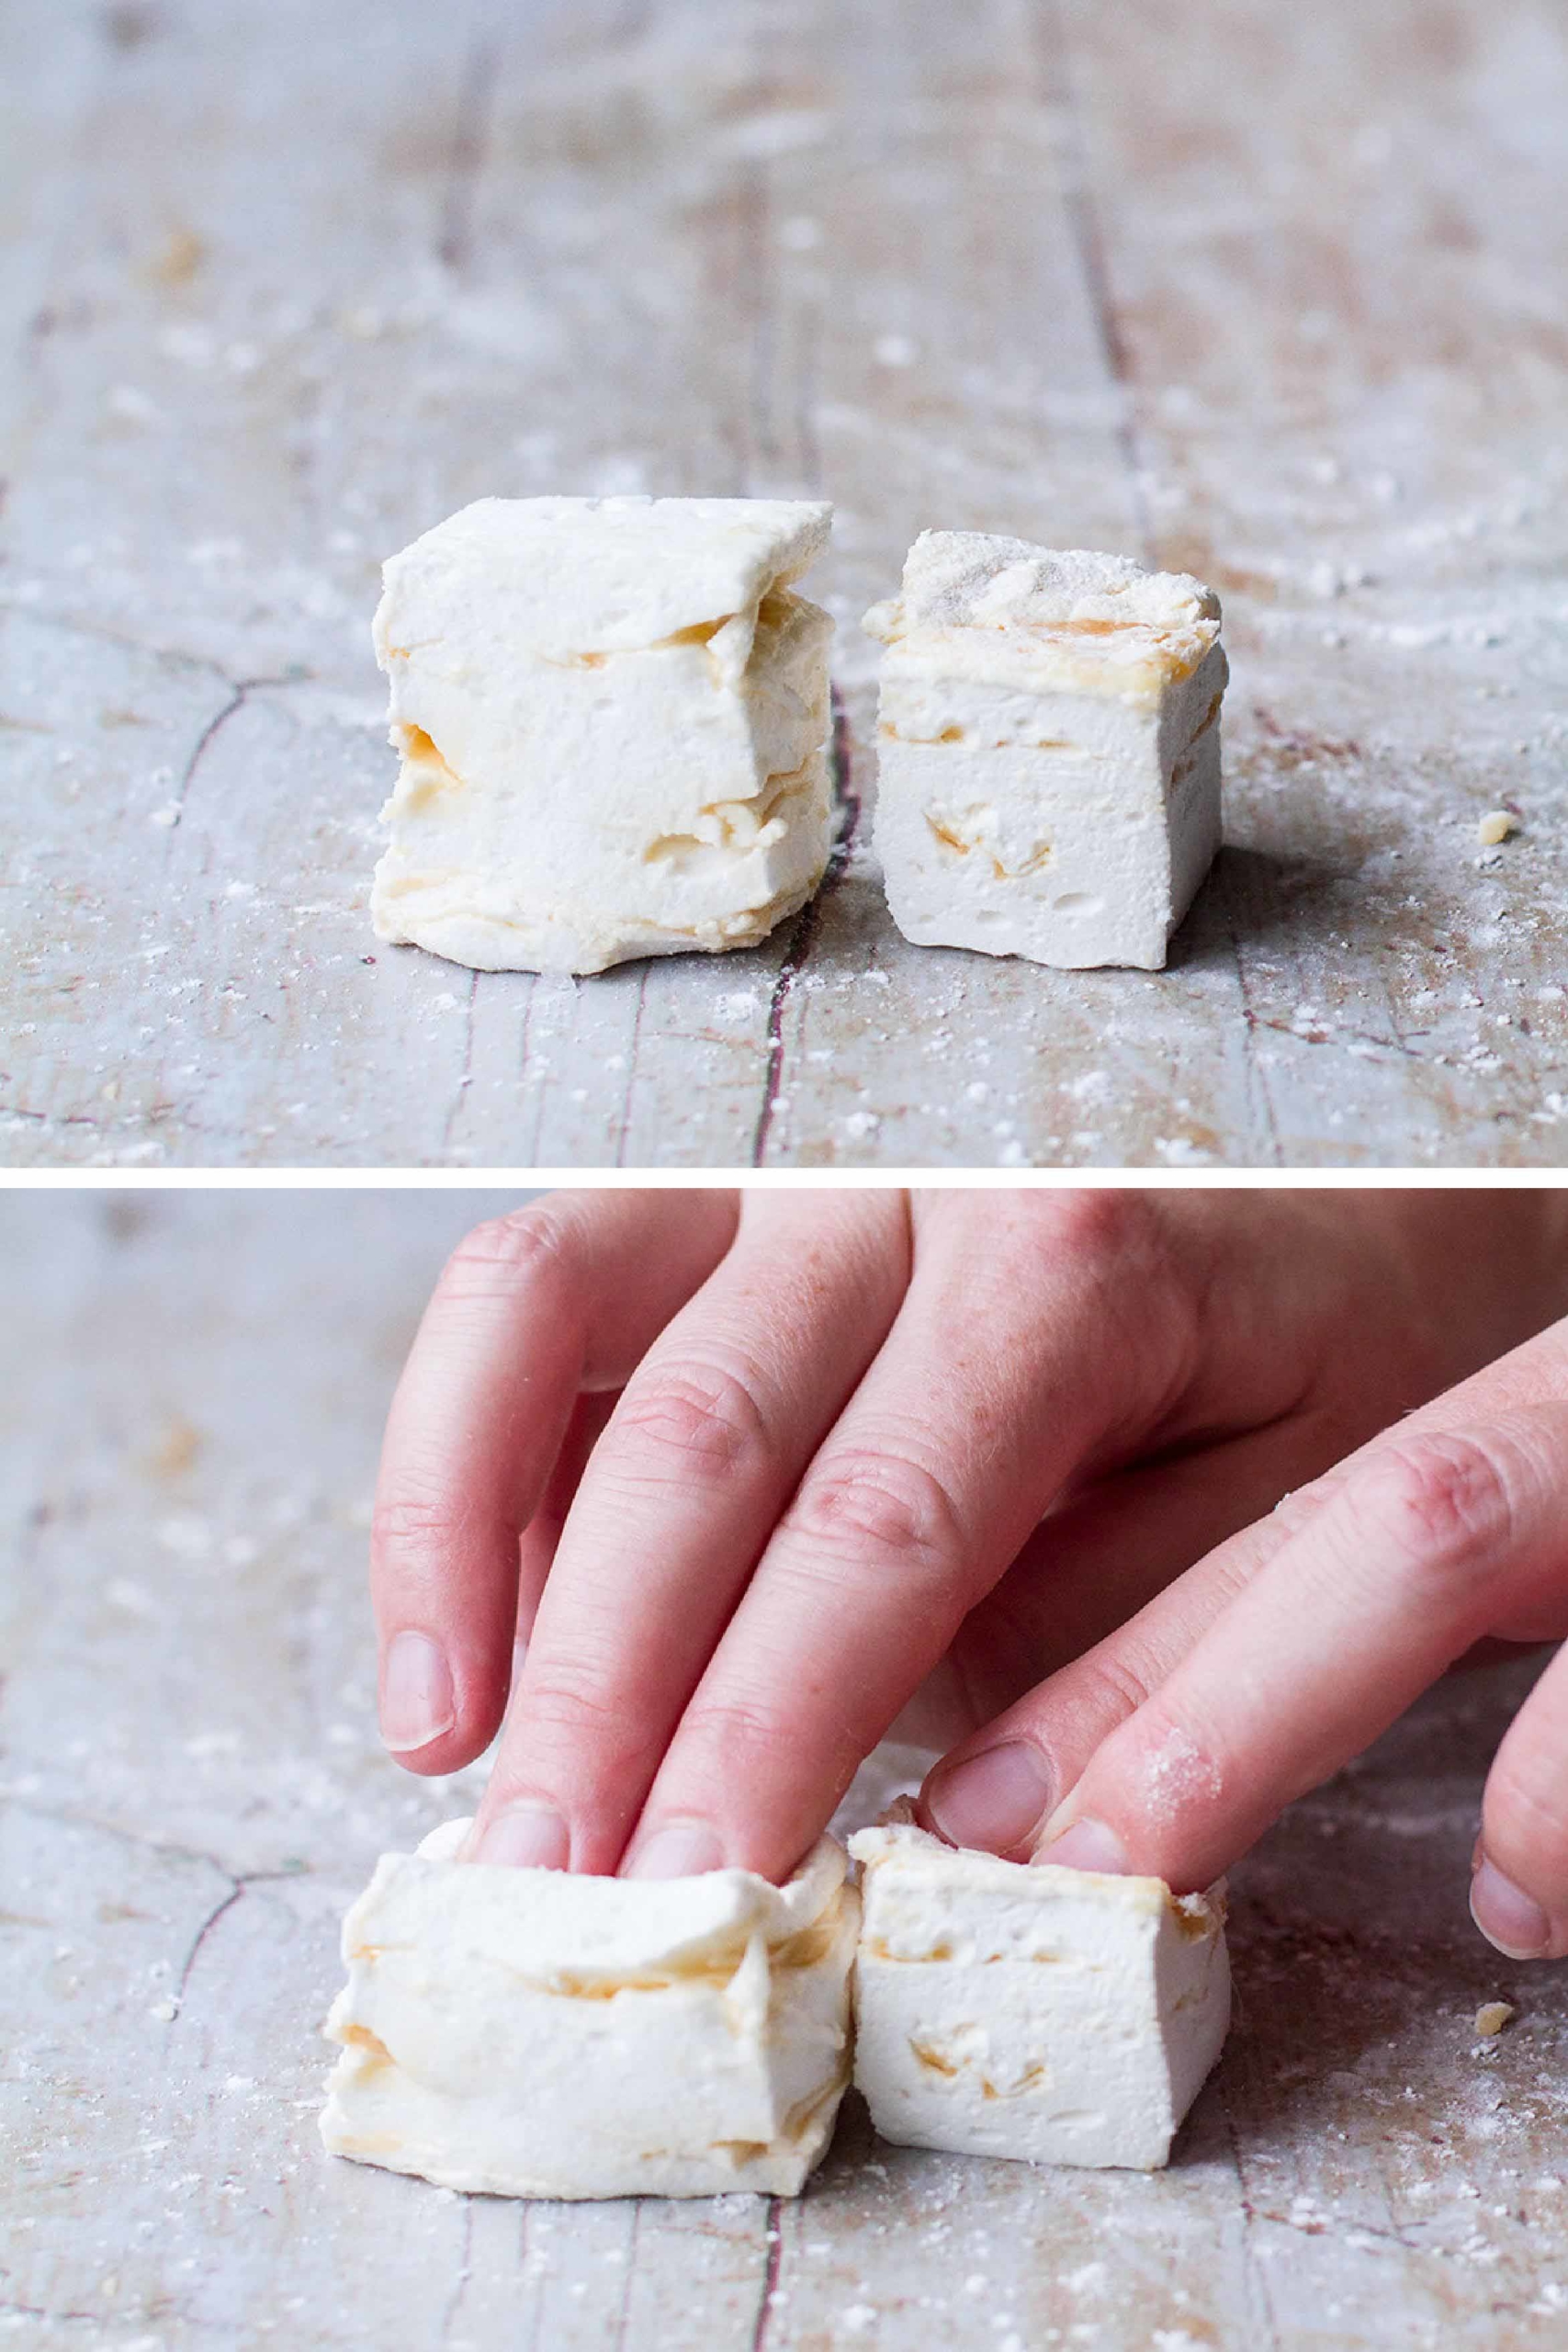
Temperature is important
I didn't realize how important the temperature actually was until I messed up. Or rather, my candy thermometer decided to retire midway during cooking the sugar syrup. It is not like you will get gross marshmallows or anything, but they will not end up with the right texture.
I highly, highly, recommend using a candy thermometer for this recipe. Then it's almost impossible to ruin them and they will get fabulously fluffy.
In these photos you can see the batch with no candy thermometer to your right, it is a lot denser and chewier, whereas the batch with a candy thermometer to your left, which are super fluffy and therefore yields a lot to pressure. Both were tasty, but only one was mega delicious, you know. And yes, both were approximately the same percentage of the 'batter', it just didn't fluff up as much.

Corn syrup vs glucose syrup
So what exactly is the difference between corn syrup and glucose syrup? All corn syrup is glucose syrup but not all glucose syrup is derived from corn. Glucose syrup can be made from high-glucose fruits like jackfruit, apricots and grapes, but in the supermarkets the most common glucose syrups are made from corn or wheat.
It is usually used as a way to avoid crystallization when it comes to boiling sugar. However, it is not sweet enough on its own so it is usually combined with other sugars as well. Exactly as in this recipe, it calls for granulated sugar and glucose syrup in the marshmallows and then coated in powdered sugar as well. Yes, give us alll the sugars.
Why coating marshmallows in cornstarch
You don't have to coat marshmallows in cornstarch, you can use potato flour as well, or even shredded coconut. The point is to cover the sticky sides of the marshmallows with something not sticky, so you can place all your marshmallows in one box without having to cut out a piece.
That being said, you may need to supplement your box of marshmallows with a new batch of powdered sugar + cornstarch after a while. It will depend on the weather actually. If it's cold and dry, you will not have to do this and I don't have to add a single gram more of it when I make peppermint marshmallows in the winter.
But when I make these salted caramel marshmallows in a (wet) summer, well yes, occasionally I have to add more. The fluffy and flavorful marshmallow will still be fluffy and flavorful though, so don't worry about that!

The recipe
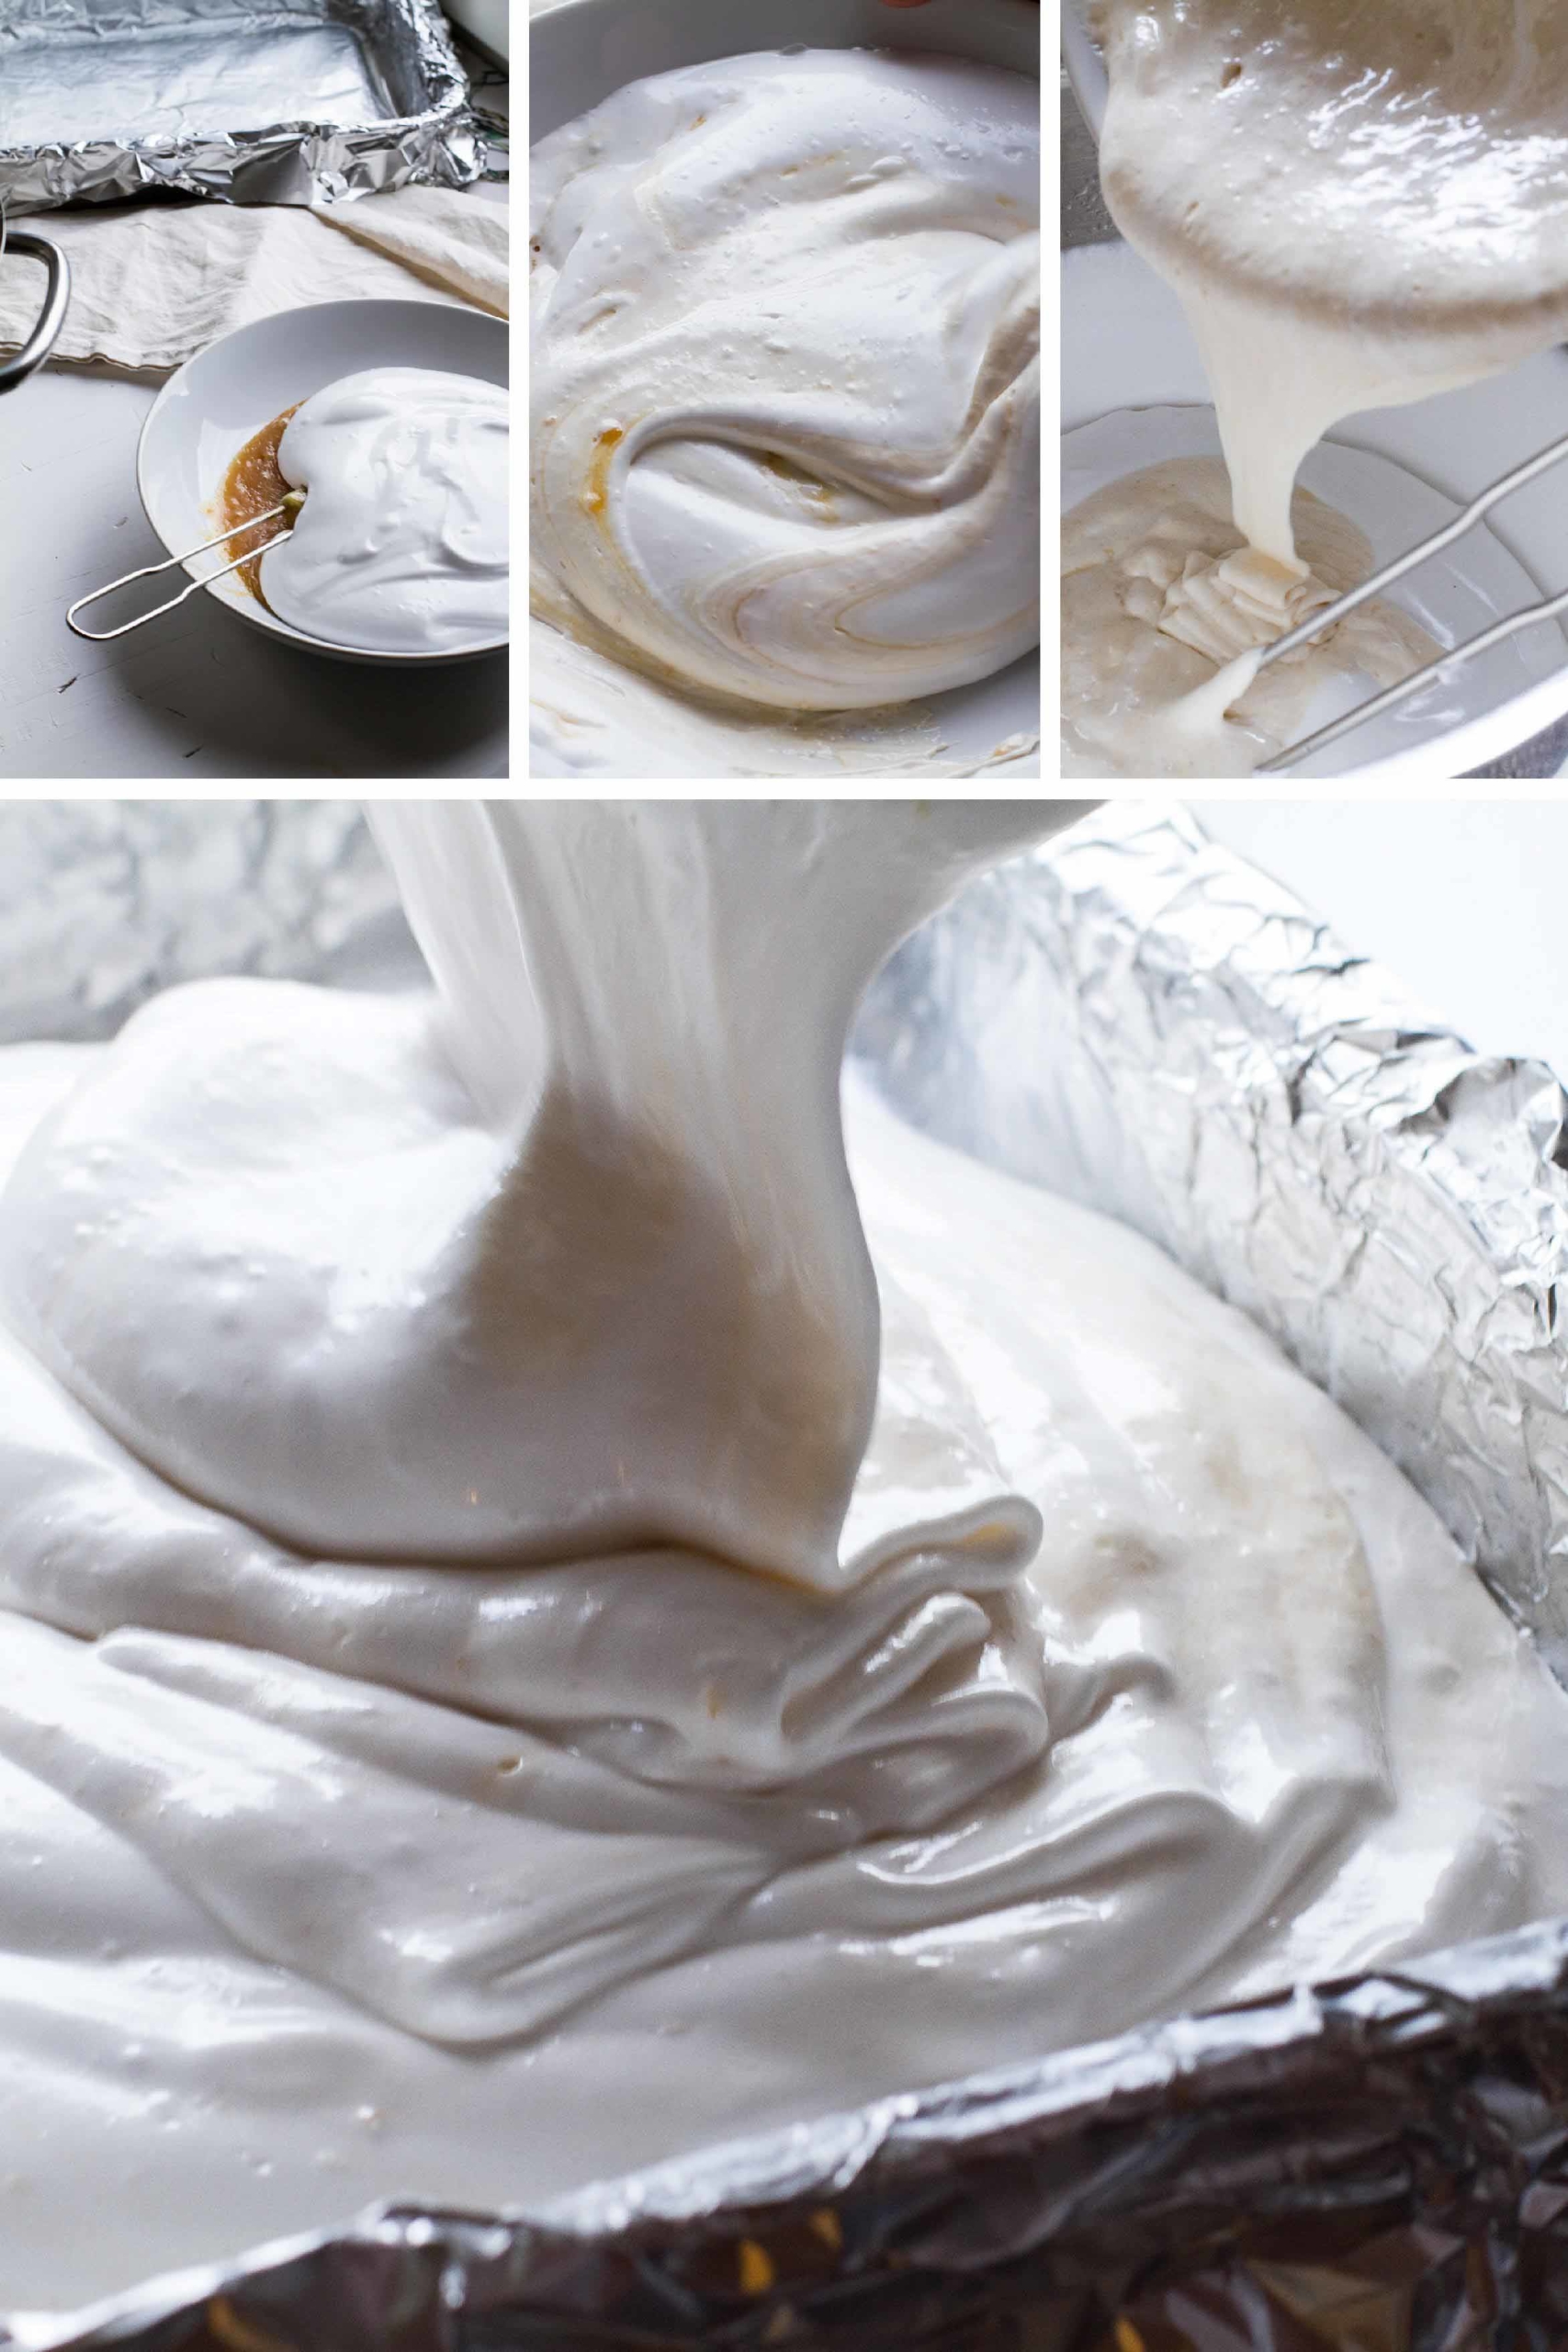
Add foil to a large baking dish, minimum 13 x 9 in (33 x 23 cm) and then spray generously with cooking spray or oil to make sure all places are covered. Yes, I say this because I have not always done it, and it is a hot mess getting the marshmallows out of the foil after.
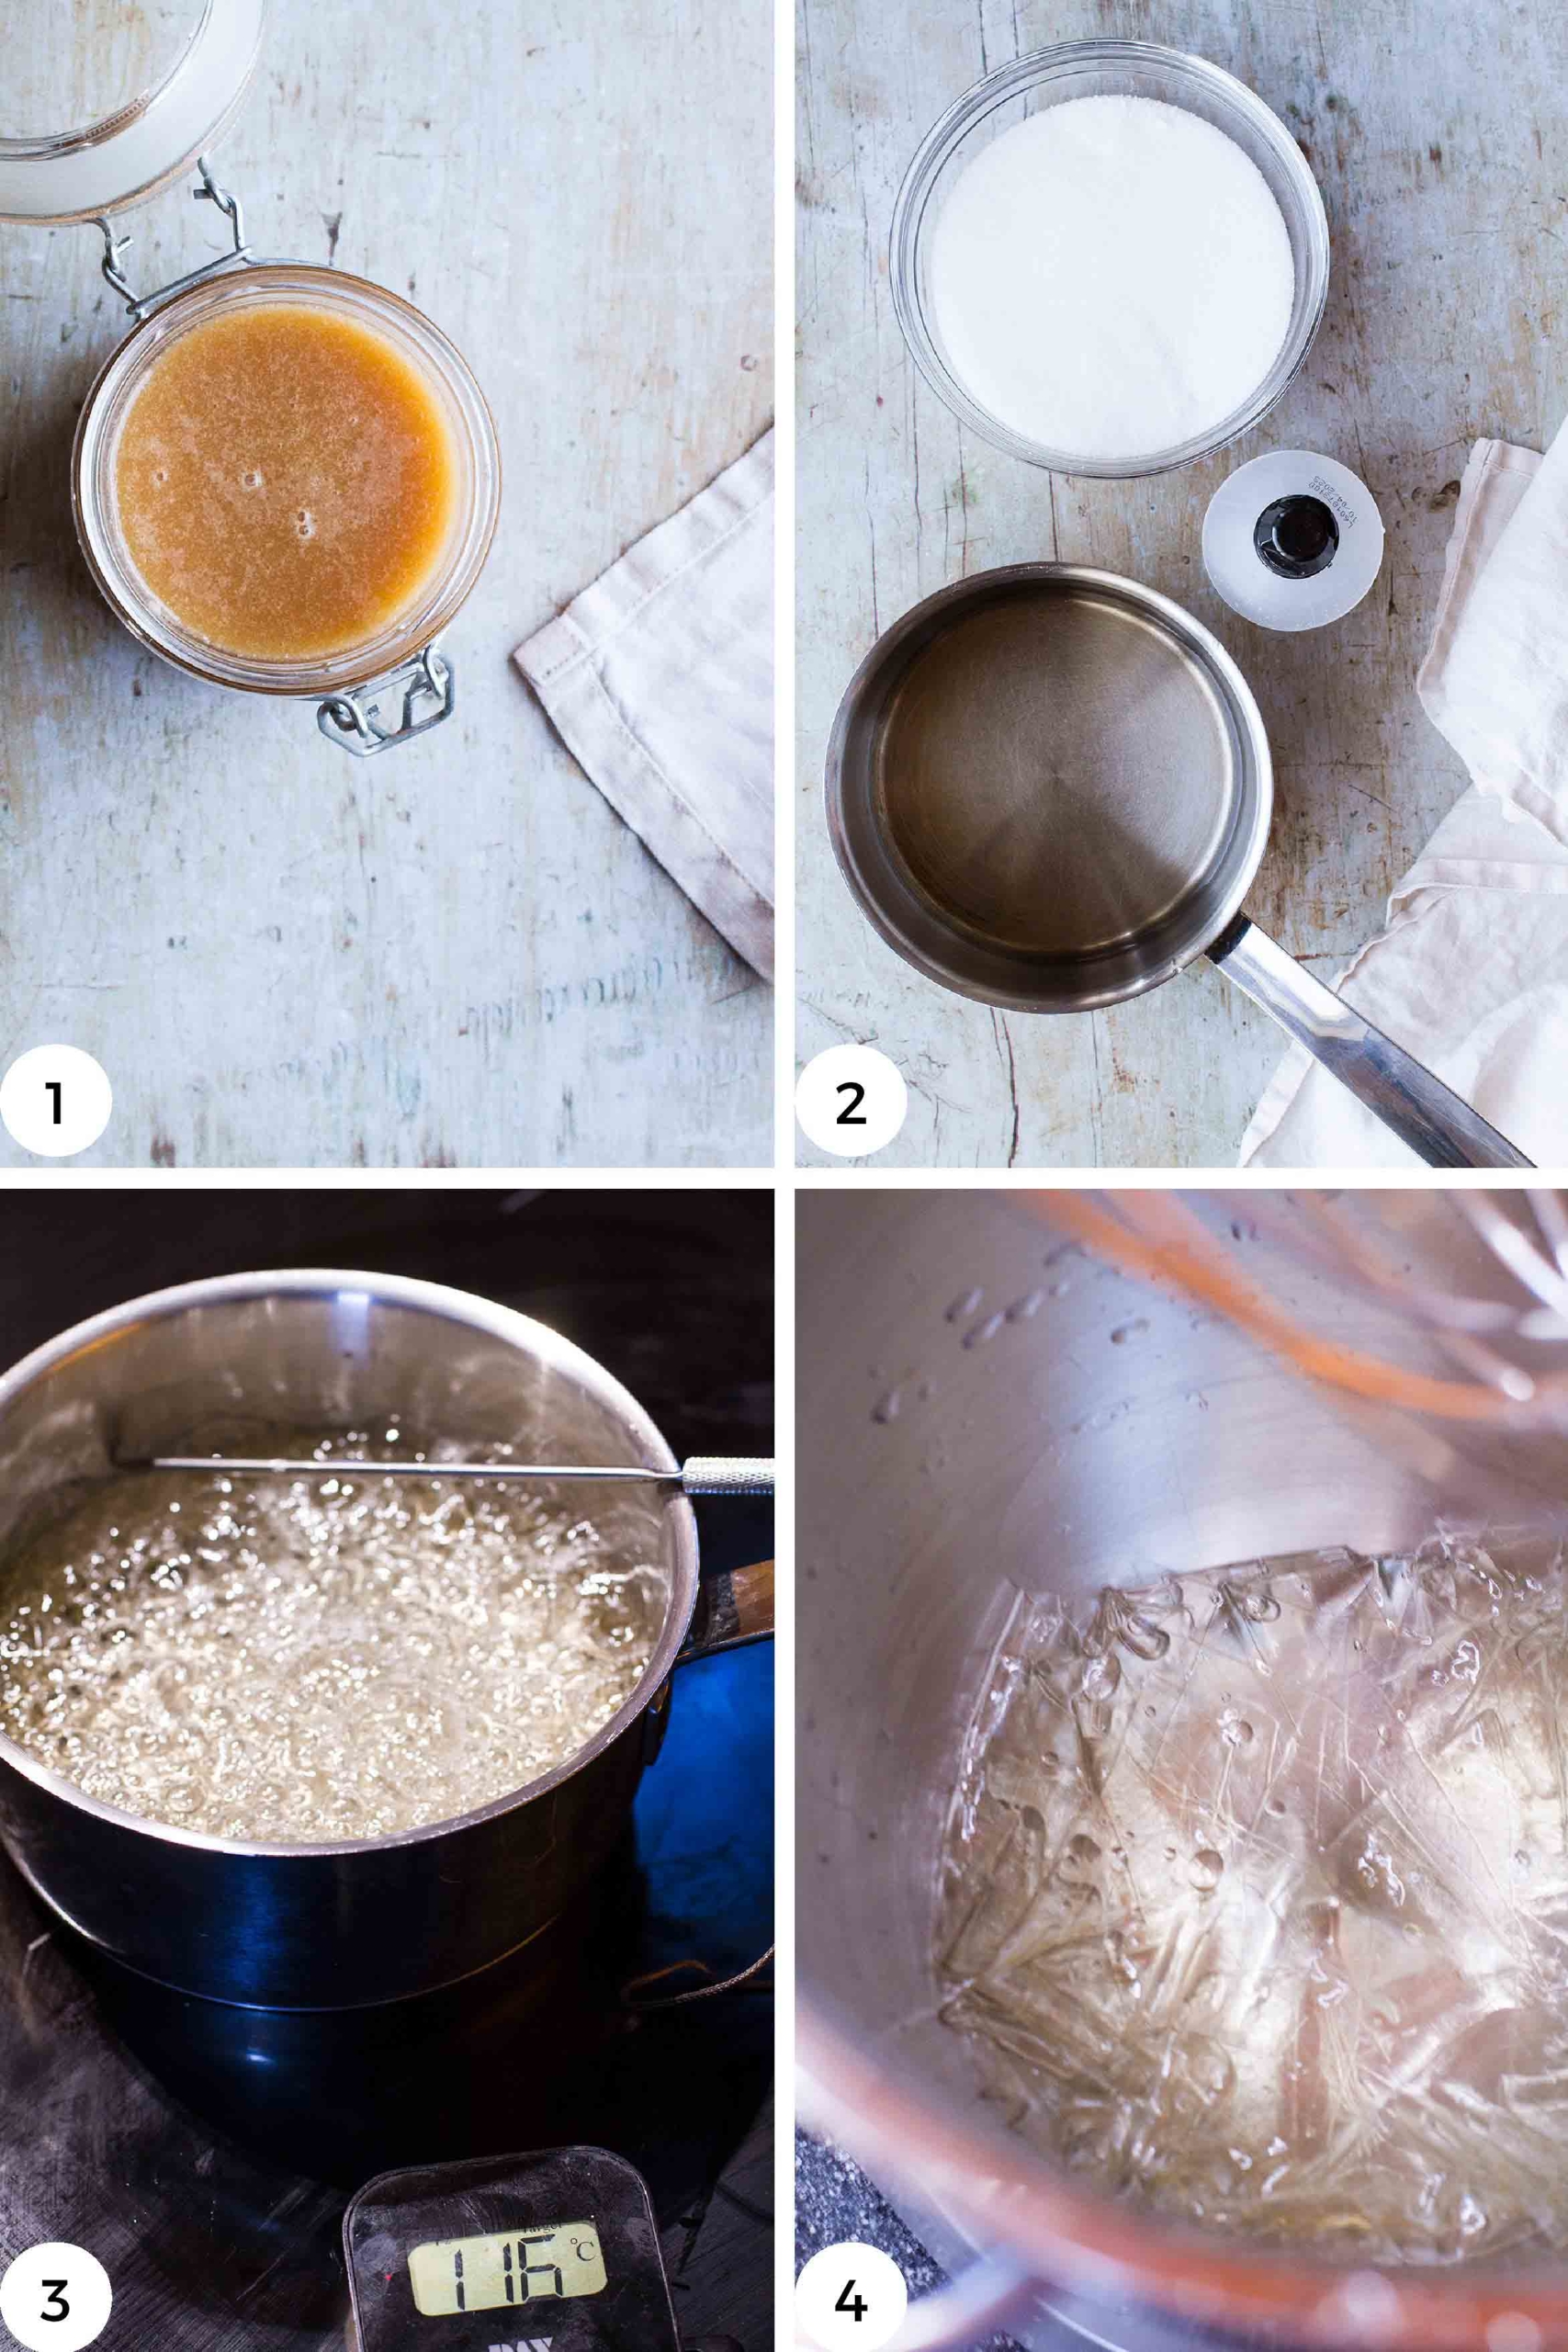
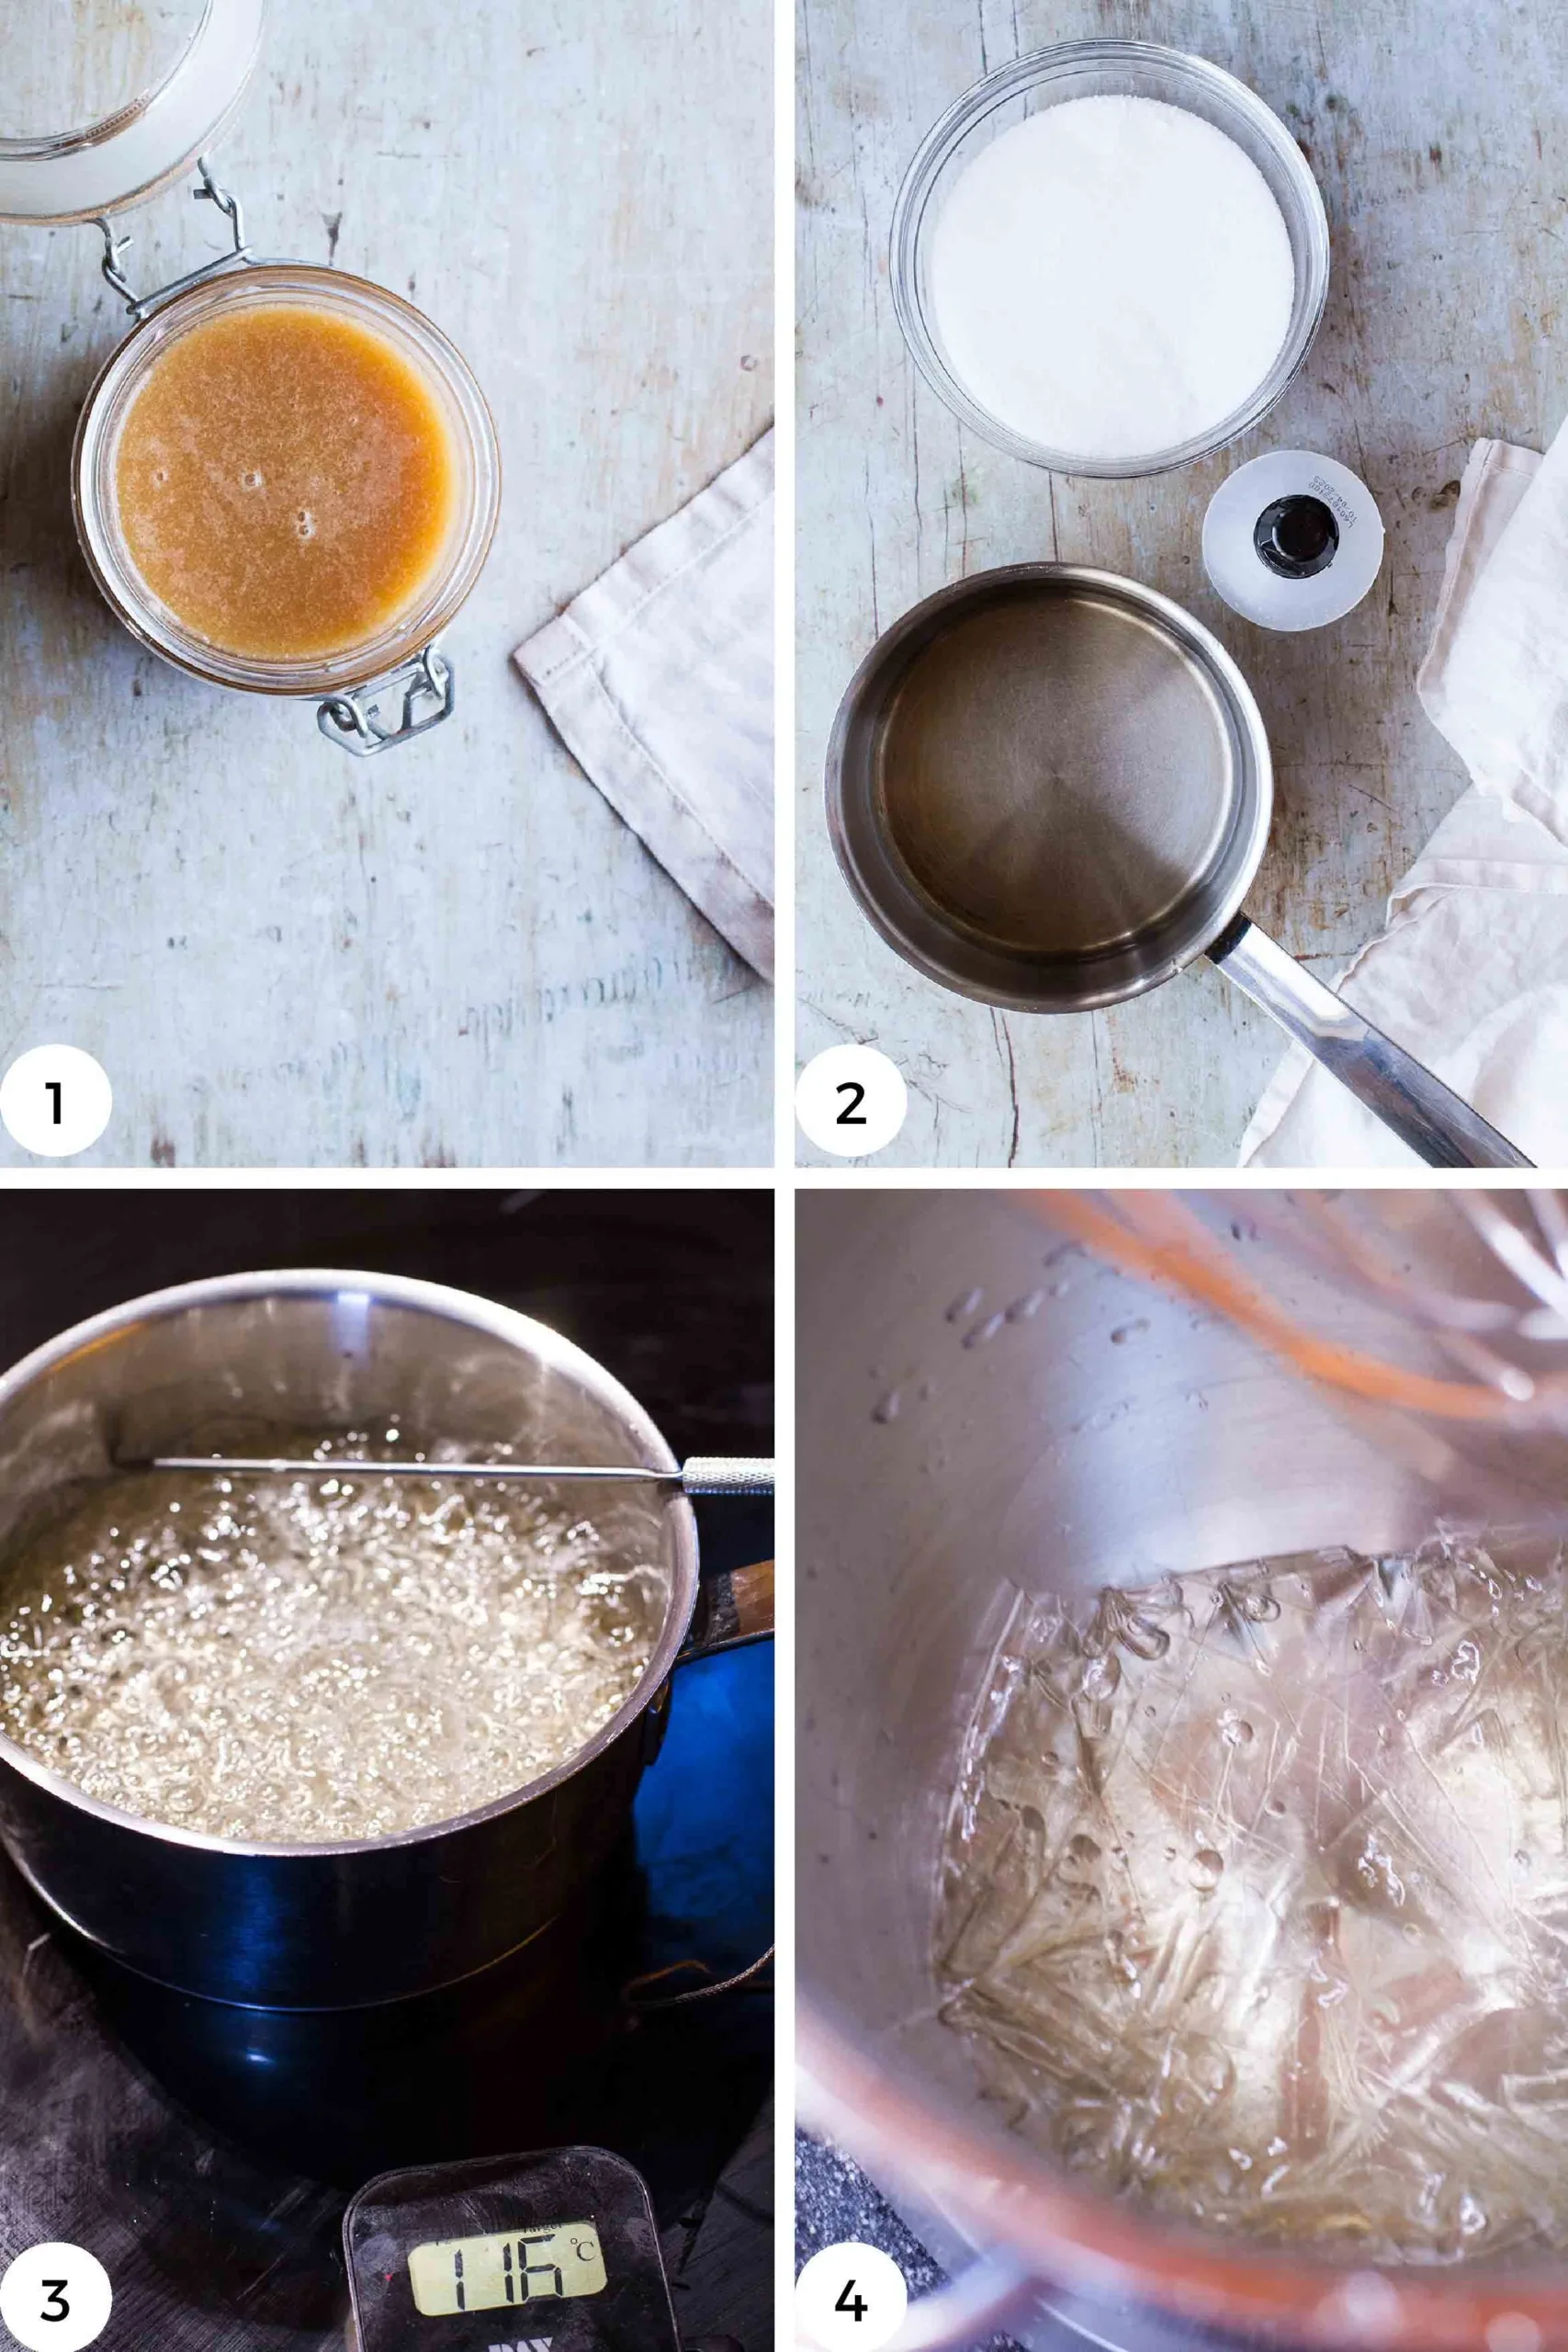
Add gelatine sheets to cold water and let it sit for 5 minutes while you continue with the rest. In a small saucepan, combine ½ cup water with glucose syrup, sugar and salt. Be careful when you add in the sugar as to not get sugar on the sides of the pan (to prevent crystallization). Give it a careful stir and put the heat on medium. Then stop stirring!

Let it simmer for around 10 minutes, until the mixture reaches 241F (116C)(#3). Meanwhile, squeeze the water out of the gelatine sheets and add them to your stand mixer bowl (#4). When the mixutre is hot enough, take it off the heat and let it cool down until it no longer bubbles. Then slowly pour it along the side of the stand mixer bowl.
Attach wire whip and gradually increase speed until high speed. Let it whip for around 18-21 minutes or until the bowl is barely warm to the touch. Then add in vanilla extract.
Now you have two choices; do you want to make marshmallows with ripples of salted caramel, or do you want to mix the salted caramel directly into the marshmallows creating a more uniform 'mallow? Both versions are delicious, but I prefer version 1 with salty caramel ripples.
Version 1 with salted caramel ripples
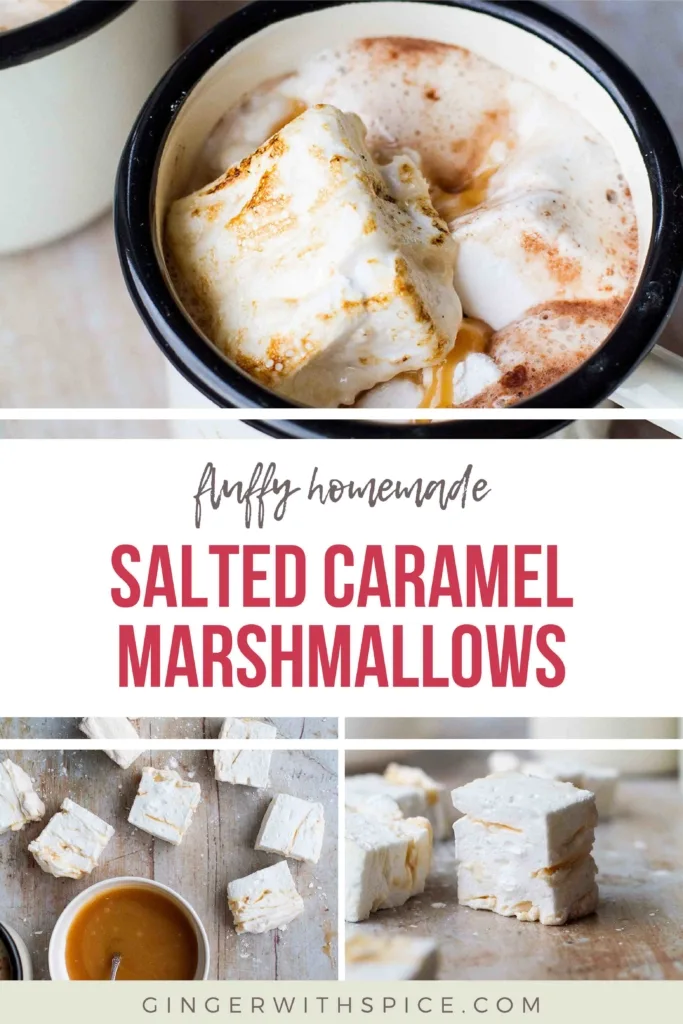
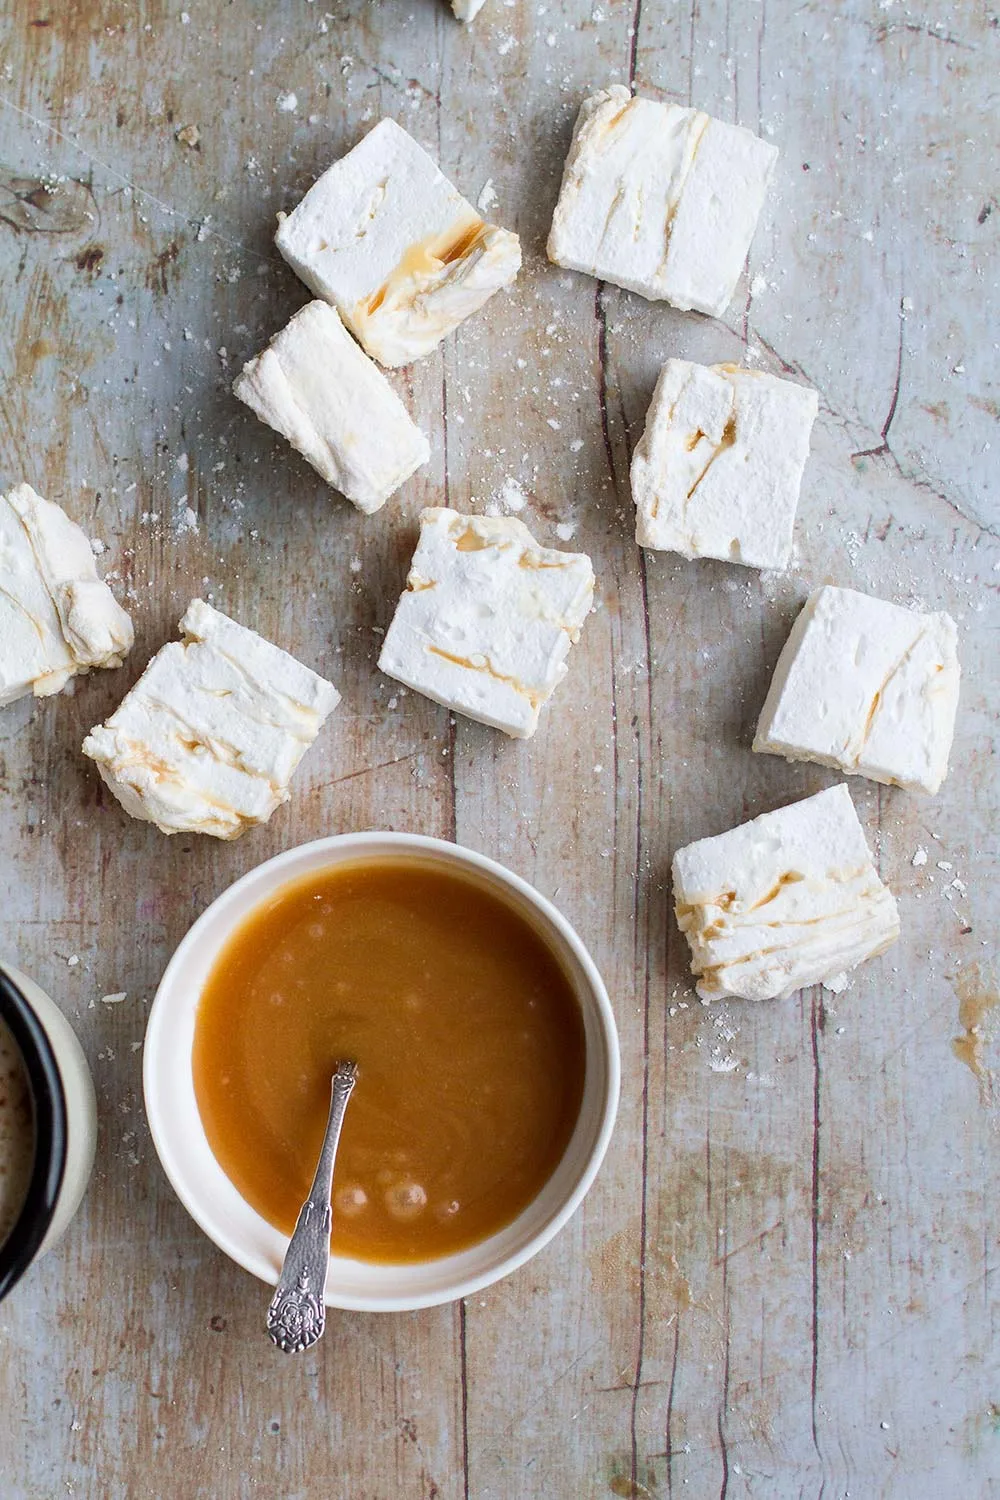
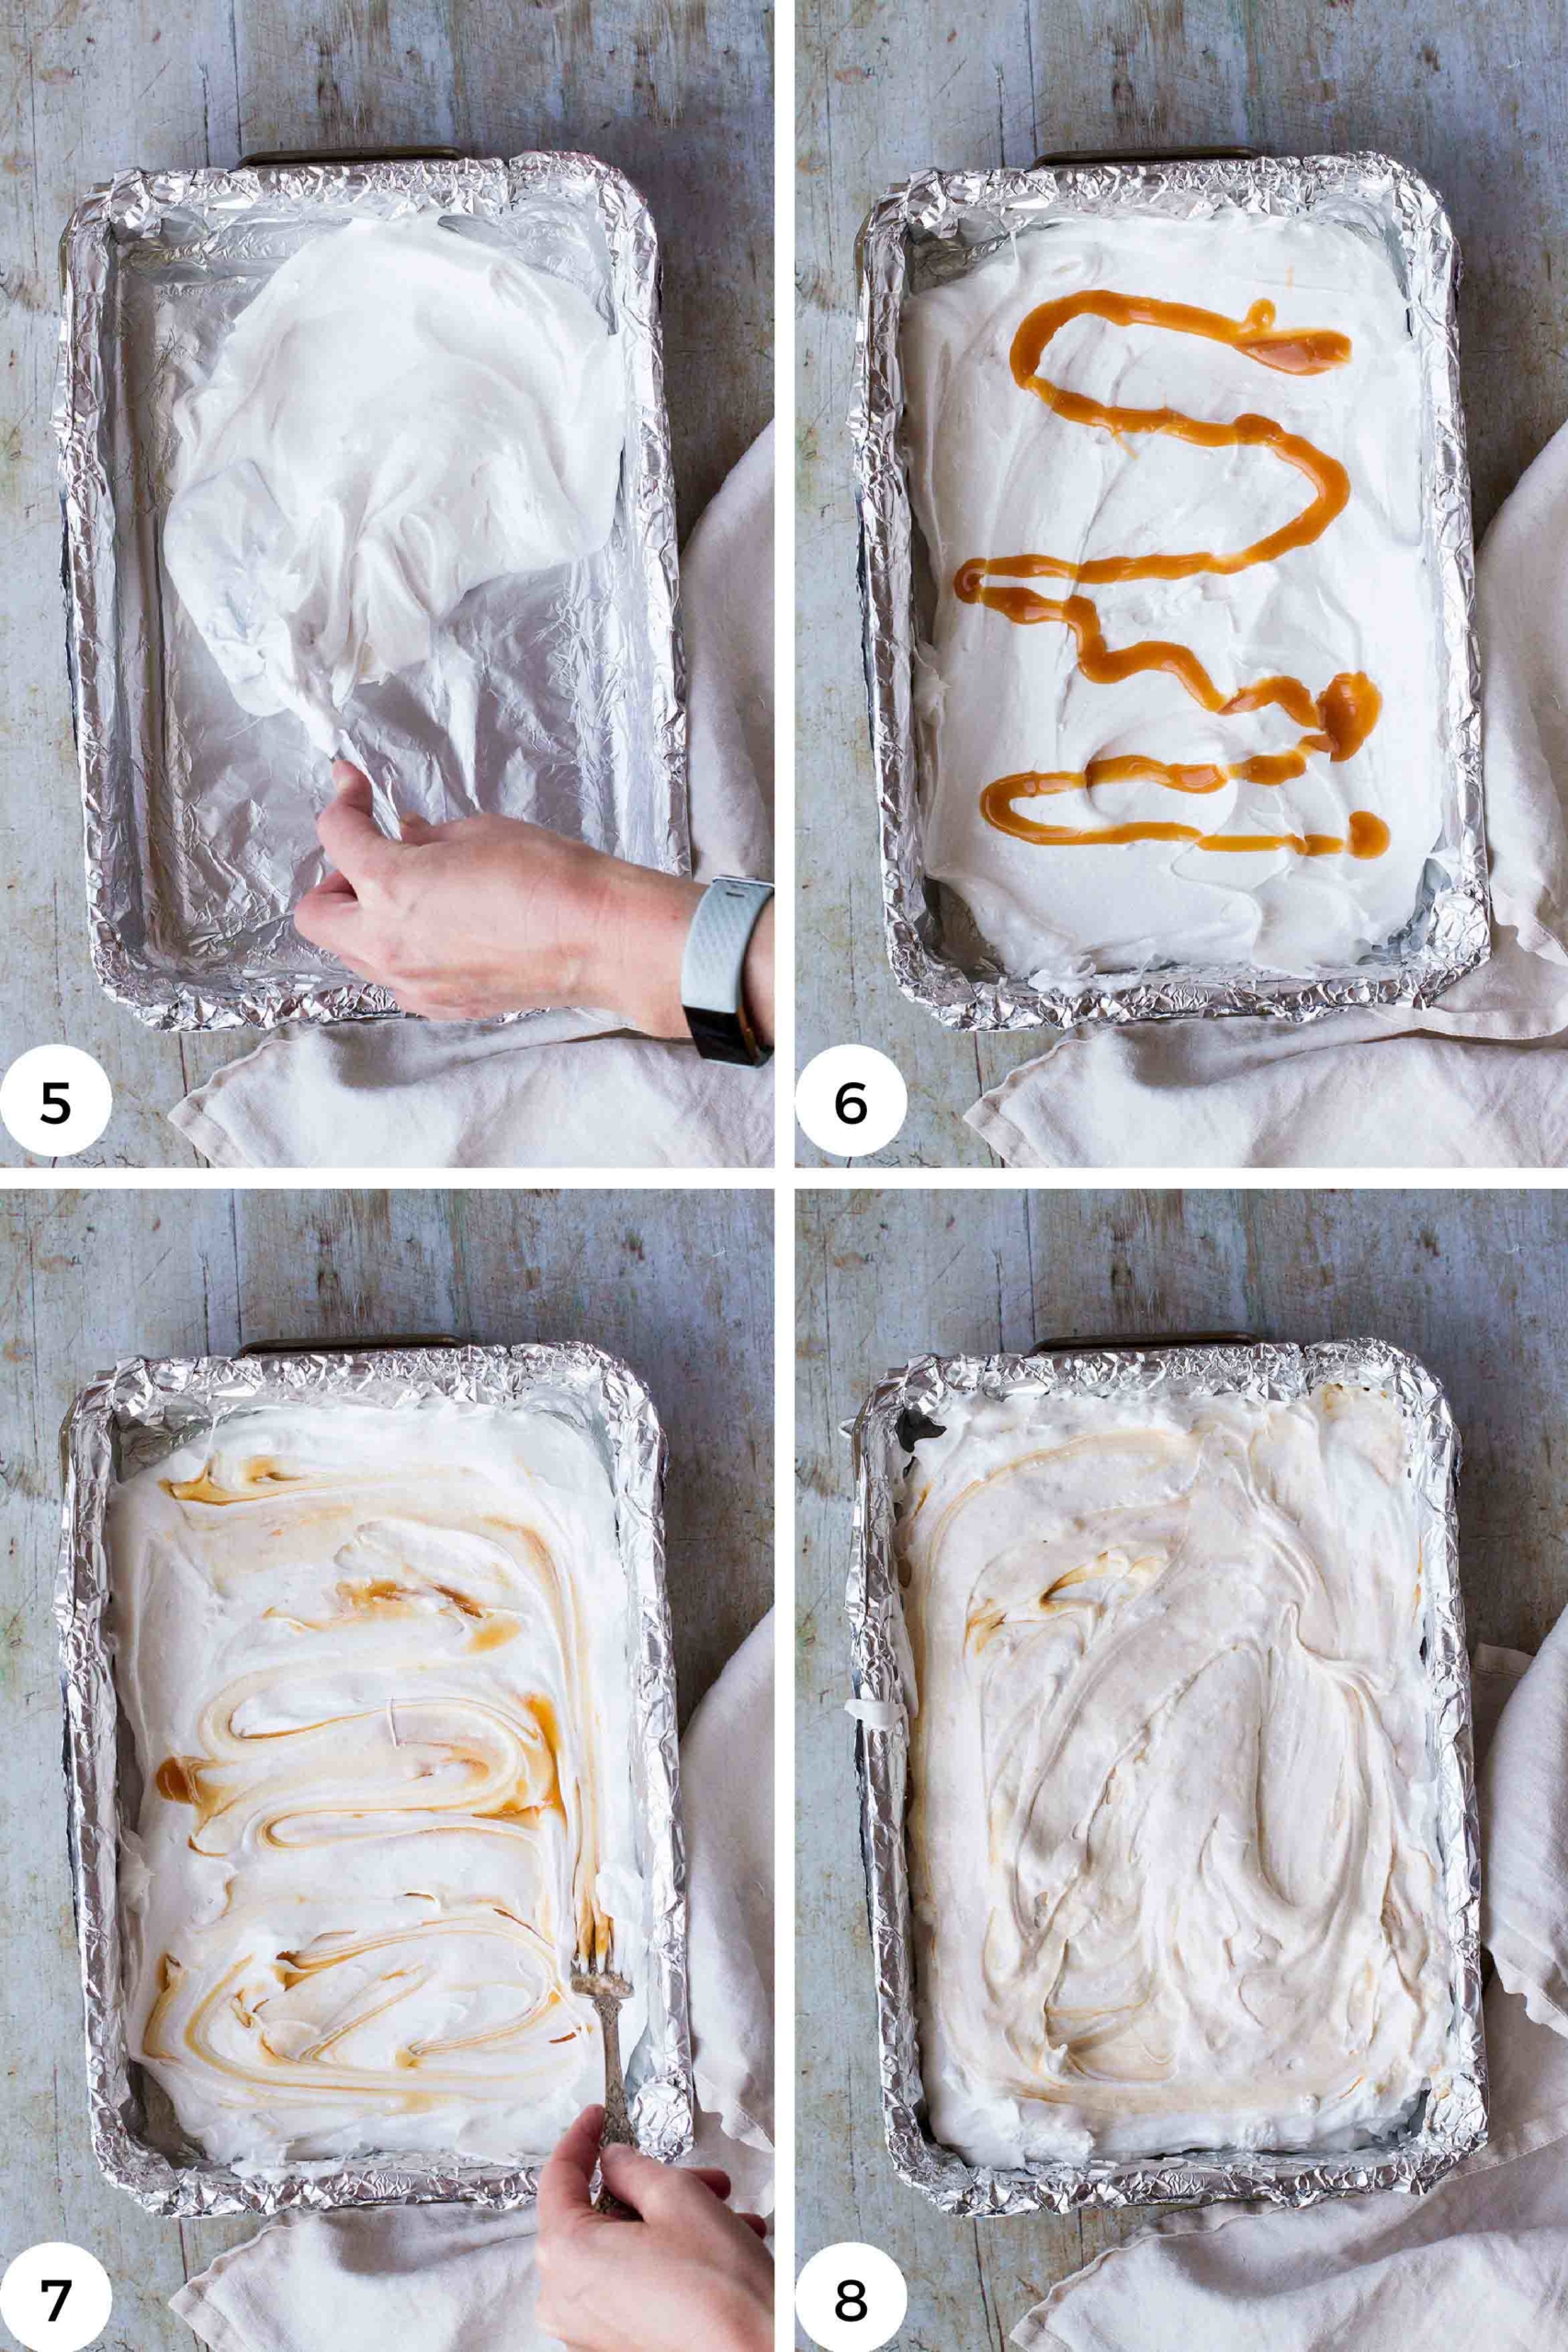
Spray a spatula with cooking spray and quickly add a third of the mixture to your prepared pan. Add a third of the salted caramel on top and using a butter knife, a fork or even a toothpick, give it a quick stir to make swirls. Then add another third of the marshmallows and continue until you have three layers of marshmallows and three layers of caramel on top of them (i.e., caramel will be the final layer).
The salted caramel I use here is a little thicker than a sauce so it won't ooze all over the place. It is the same caramel that I use in these milk chocolates, salted caramel macarons and chai cake.
Images numbered 5-8 show this method. And most photos are of rippled marshmallows, however, the photos below are for version 2.
Version 2 with salted caramel sauce in marshmallow 'batter'
This version will probably be a little less messy (although I was surprised at how little messy the others were too), and will be great for bringing to campfires and keeping in a jar for longer. And this version could also use salted caramel sauce, which is a little thinner.

Take half or a third of the marshmallow batter and mix in a large bowl with the salted caramel. Just give it a quick mix, then add it back to the big bowl of marshmallows and give it another quick stir.
You don't have to mix it well, after all, version 1 is barely mixed and that works really well too.

For both versions;
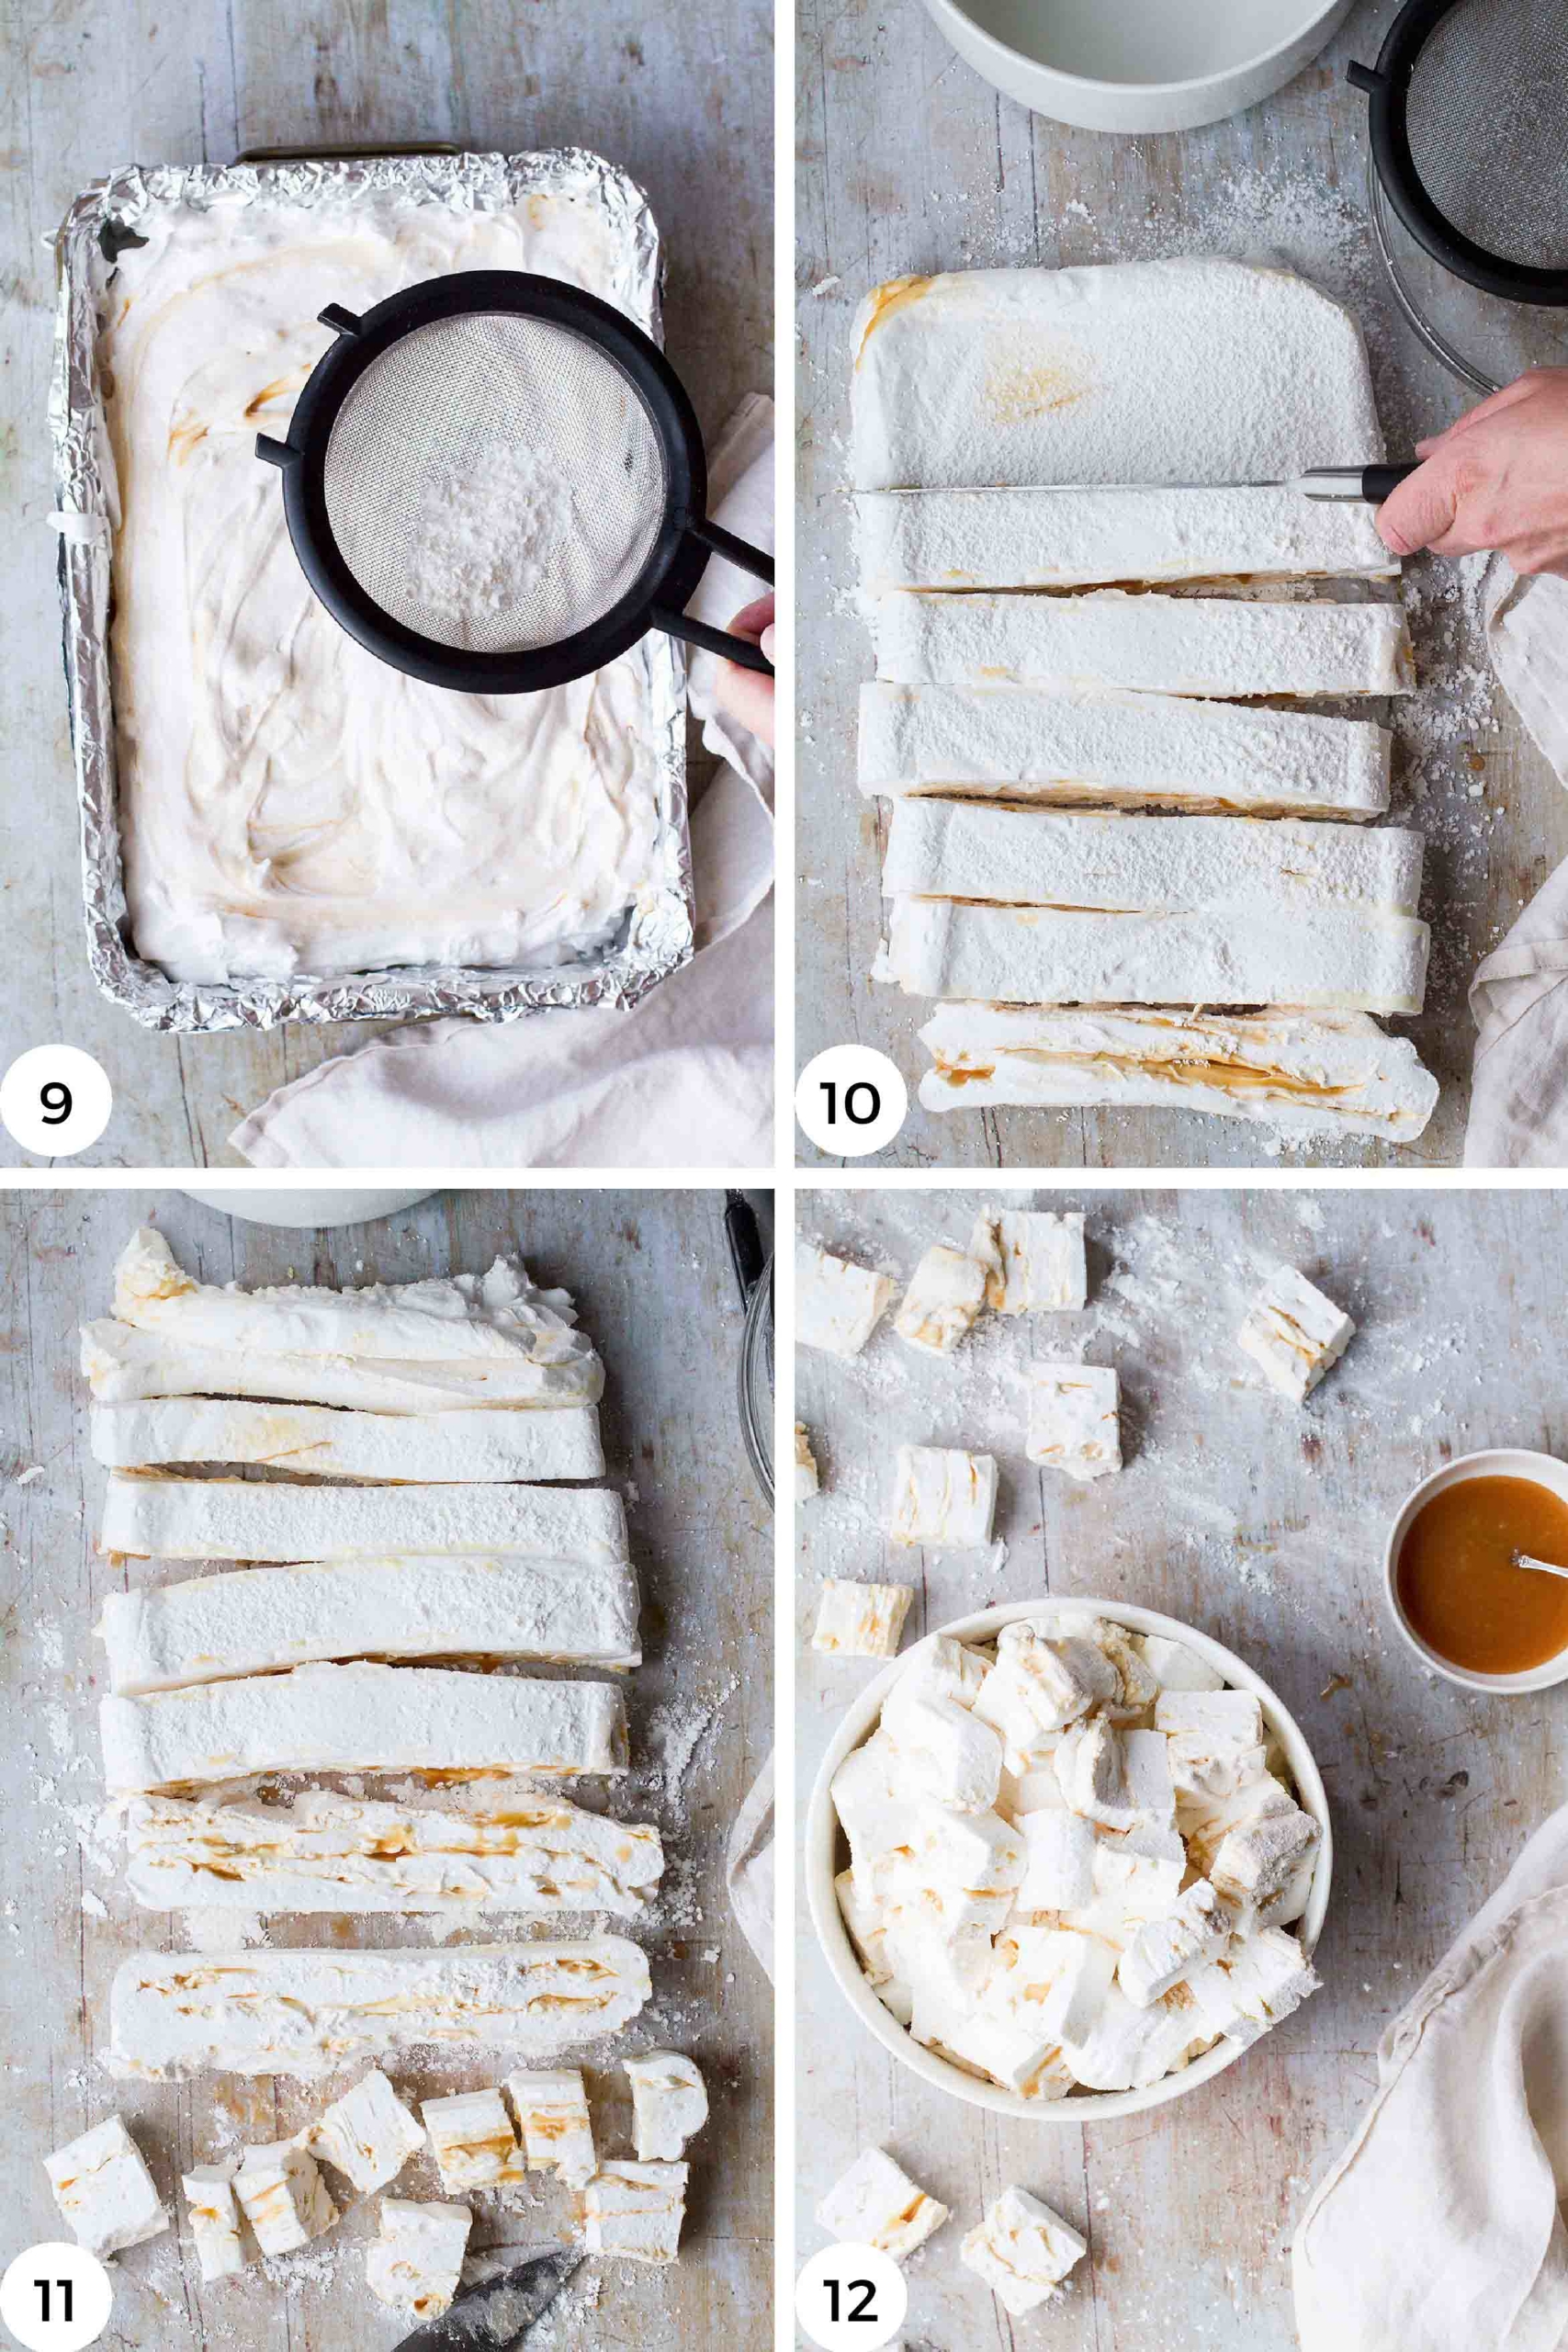
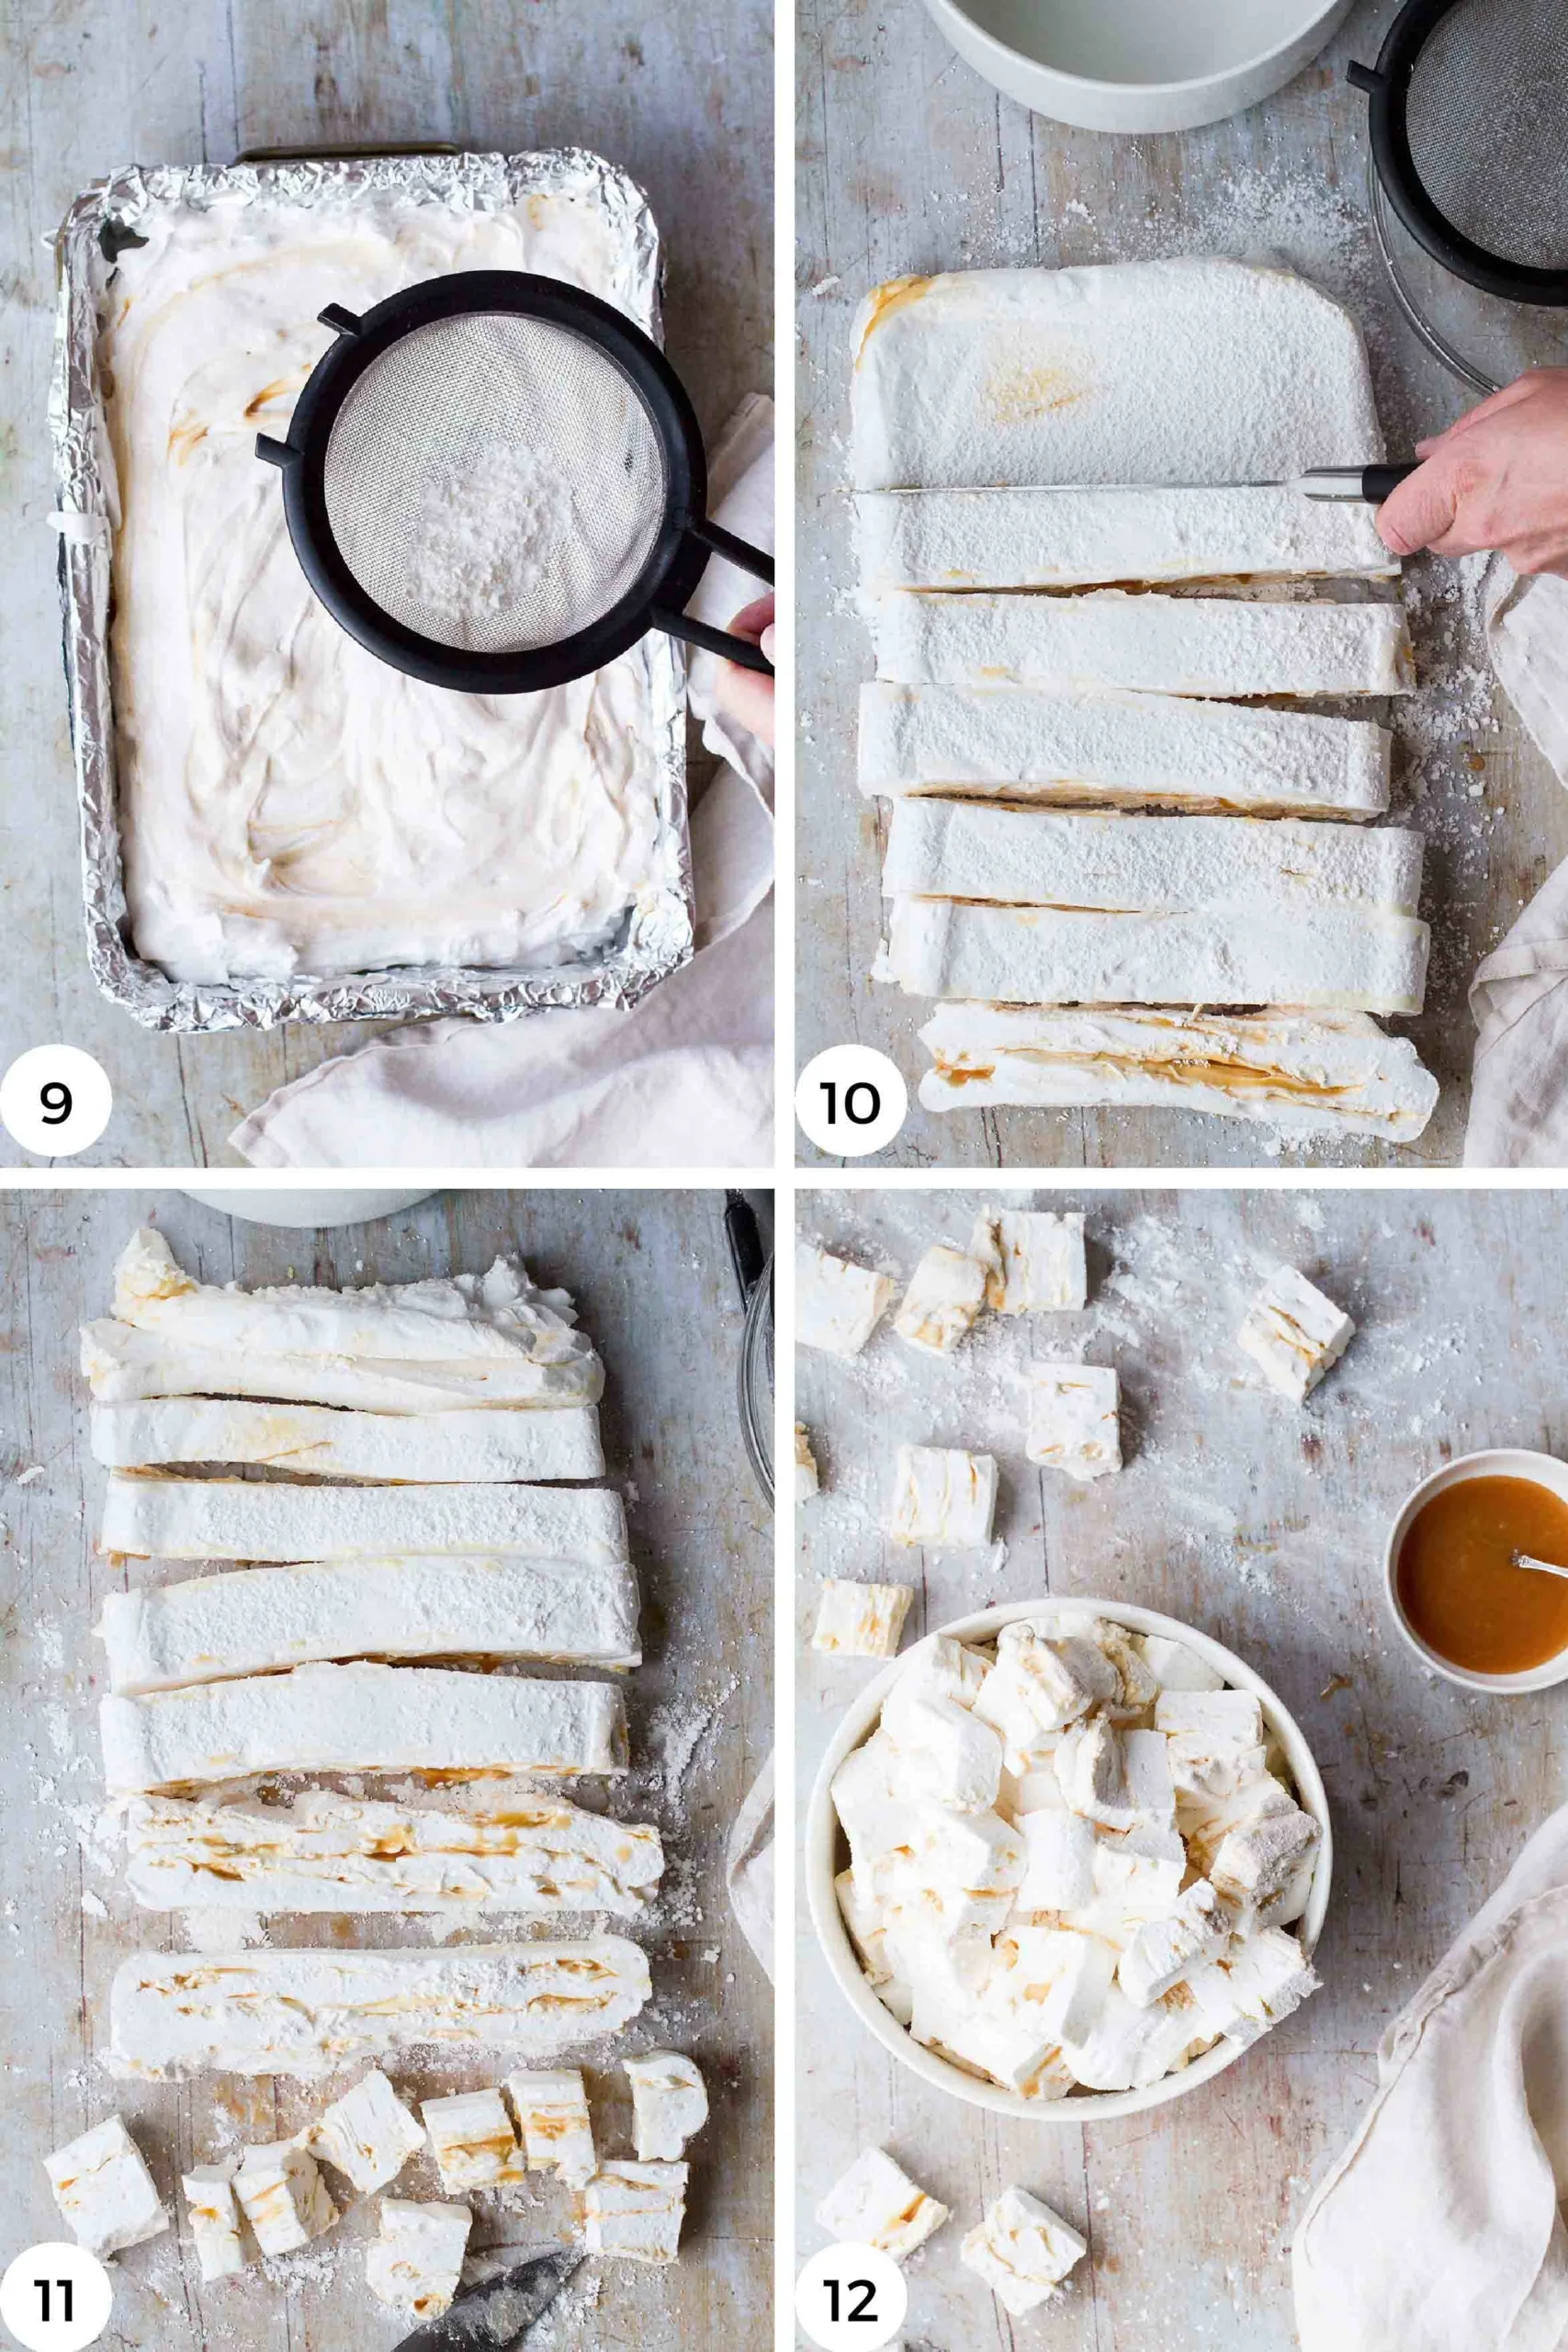
Mix cornstarch and powdered sugar together and sprinkle 2 tablespoon of it on top of the marshmallows. Cover loosely with aluminum foil and let sit overnight before slicing into cubes.
The next day
The next day, sprinkle cornstarch mixture on your counter and dump the marshmallow on top, making sure both sides are covered with the cornstarch. Now you're ready to cut it as you wish. Always spray your knife with cooking spray so that it slides easily through the marshmallows. Cover with cornstarch mixture before adding to an airtight cookie box. Good for at least 2 weeks.
Enjoy with s'mores, toasted on its own or on top of hot chocolate!

Did you like this recipe? Here are more salted caramel treats I think you will like:
- Salted caramel milk chocolates
- Salted caramel chai cake (6 inch)
- Rich Guinness coffee salted caramel sauce
- Salted caramel apple mini pavlovas
- Salted caramel macarons with homemade salted caramel sauce
- Super fudgy coffee caramel brownies
I’d love to hear your thoughts. Comment below or tag me @thegingerwithspice on Instagram. And don’t forget to Pin it for later! To make sure you’re never missing another recipe, please feel free to subscribe to my newsletter. As a thanks you will receive a free e-cookbook Travels Through the Seasons, with many delicious recipes from around the world that suit different seasons of the year.
In order to keep the blog up and running this post may contain affiliate links, it will be at no extra cost to you, please read the disclosure for more information.
Download your FREE copy of Travels Through the Seasons Cookbook here!
📖 Recipe

Homemade Salted Caramel Marshmallows Recipe
Imagine soft and fluffy homemade caramel marshmallows with ripples of salted caramels inside as lovely salty surprises. Perfect for s'mores!
Ingredients
Salted caramel
- 1 cup sugar, 200g
- ¼ cup water, 4 tbsp
- 7 tablespoon heavy cream, 100ml
- 3 tablespoon butter, 45g, cut in 1 tablespoon cubes
- 1 teaspoon pure vanilla exract
- 1 teaspoon salt
Marshmallows
- 15 gelatine sheets, or 2.5 tablespoon gelatine powder
- 1 cup water, divided. 250 ml
- ⅔ cup glucose syrup (or corn syrup). 160 ml
- 2 cups sugar, 400g
- ¼ teaspoon salt
- 2 teaspoon vanilla extract
- ½ cup powdered sugar, 50g
- ½ cup cornstarch, 60g
Instructions
- First, make salted caramel. Lay out all the ingredients and carefully add the sugar and water to a tall saucepan. Over medium heat, stir until sugar is somewhat dissolved but stop stirring before it boils. Let it boil for around 7 minutes or until it smells nutty and has an amber color.
- Take it off the heat and while constantly whisking, add the heavy cream in a slow stream. Then stir in butter, 1 tablespoon at a time, before stirring in salt and vanilla extract. Pour into a heat safe container. Once cold, it may be easier to use a piping bag to quickly add to the marshmallows.
- Foil a 13 x 9 in (33 x 23 cm) baking pan*. The edge of the foil should be sticking out on all sides to make it easier to get the marshmallows out later. Spray generously with cooking spray or oil, and remember the sides!
- Add 15 sheets of gelatin to a bowl or tall glass and completely cover with water**. Let sit for at least 5 minutes while you prepare the rest.
- In a medium saucepan, add ½ cup (125ml) water, the glucose syrup, sugar and salt. Carefully pour the sugar in, so as not to hit the sides of the saucepan. This prevents crystallization later. Give it a careful stir before putting the heat on.
- On medium heat, bring it to a boil and let it simmer for around 10 minutes. It should reach 241F (116C).
- Squeeze the water out of the gelatine sheets and place in the bowl of your stand mixer. Then add ½ cup (125ml) new water.** Attach the wire whip.
- On low speed, carefully pour the sugar mixture into the stand mixer's bowl with the gelatine. Gradually increase the speed to high and let the mixture go for around 18-21 minutes. Start checking the outside of your bowl at 10 minutes, the bowl should be barely warm (not cold) - then it's done. Towards the end, pour in the vanilla extract.
- When it's done we need to move fast. Spray a spatula with cooking spray or oil, and quickly pour a third of the marshmallows into the prepared baking pan. Add a third of the caramel and use a knife or a toothpick to make quick swirls. Repeat until all marshmallows and caramel are used.
- Whisk together powdered sugar and cornstarch and sift 2 tablespoon of the mixture on top of the marshmallows. Set the rest of the mixture aside for later. Cover marshmallows loosely with aluminum foil and let it set overnight.
The next day (or 8-12 hours)
- Sprinkle a little of the cornstarch-sugar at a clean working surface. Turn the marshmallows upside down and carefully remove the pan and the foil. Sprinkle the top (or it used to be the bottom) with 2 tablespoon of the cornstarch mixture.
- Spray a sharp kitchen knife with cooking spray and start cutting into your desired size. My favorite size is 4 x 4 x 1.5 cm (1.5 x 1.5 x 0.6 in).
- Take a handful of marshmallows and cover them generously with the cornstarch mixture, place them in a sieve and shake off the excess (in the kitchen sink). Continue with the rest. Store airtight, in a cool, dry place. Good for at least 2 weeks.
- Perfect in a cup of hot chocolate, they can also be toasted (preferably with a kitchen torch, they may melt too fast over a fire) or served with s'mores!
Notes
* This recipe completely fills a 13 x 9 in baking pan, so do not choose a smaller one, go bigger if that's all you have. You cut the marshmallows into the shapes you want later, so as long as it's not suuper big, it should be more than fine.
** If you've got gelatine powder instead, add 2.5 tablespoon gelatine in half a cup of water into the mixing bowl of your stand mixer - let sit for 15 minutes. Then break the gelatin mixture with your stand mixer on low speed.
*** Because the mixture rises so much, I would cut the recipe in half if you use a hand mixer.
Instead of making ripples, you can mix half of the marshmallows with salted caramel sauce and then quickly stir this back into the other half of the marshmallows.
Recipe adapted from: America's Test Kitchen and my peppermint marshmallows recipe.